Fiber Fool

Follow the feats and foibles of a fiber fanatic.

My New Favorite Soap

Filed under: Homemade Beauty — Kristi at 10:34 am on Thursday, November 4, 2010

Women's Citrus Shave Soap

For a very long time I’ve been a body wash person. Perhaps it was due to the shower situation back on the farm - a 3/4 height cinder block wall with a shower head and a sump pump. It wasn’t exactly conducive to using bar soap, especially with 4 of us using it. It has just been my default soap type. But the ingredient list on liquid soaps is lengthy and definitely not very natural. I’ve had such a good response to using all natural cleansers and moisturizers on my face that I decided eliminating as many chemicals as possible was a good idea.

Women's Citrus Shave Soap

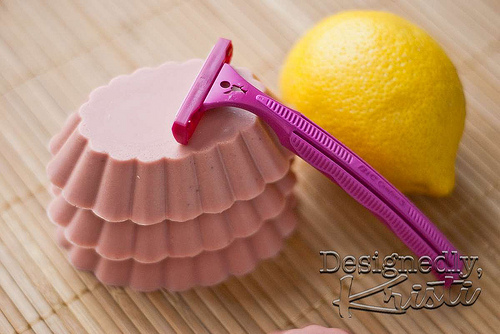
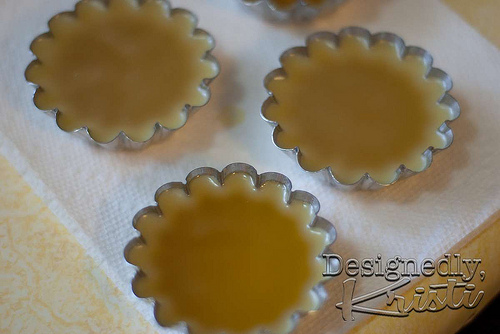
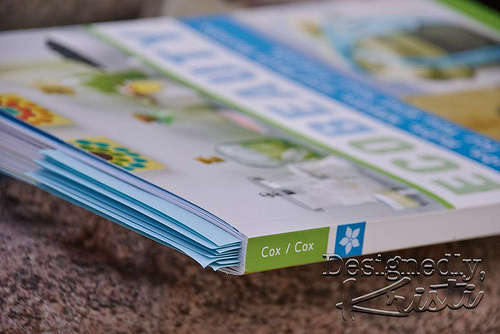
When I won Lark Craft’s blog contest for the soapmaking and candlemaking books I jumped right in on the soap making. It was easy to do since Soapmaking the Natural Way is all recipes for melt and pour soaps. I was surprised to learn that most melt and pour bases are all natural. I did not have to worry about working with lye or have the curing time for the soap to saponify. I used a 50% coupon for Michael’s and bought a 2 pound Goat Milk base for $4.50 and made two different kinds of soap. I’ve actually been using both daily, but today I’m talking about the Women’s Citrus Shave Soap.

Women's Citrus Shave Soap

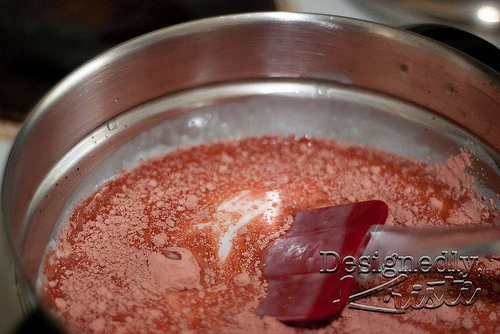
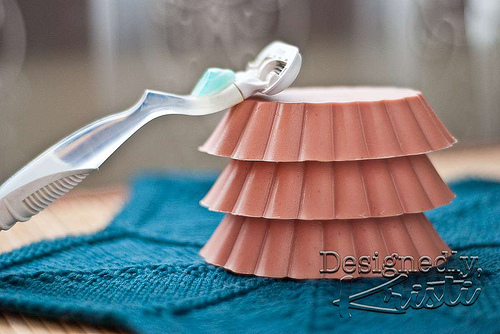
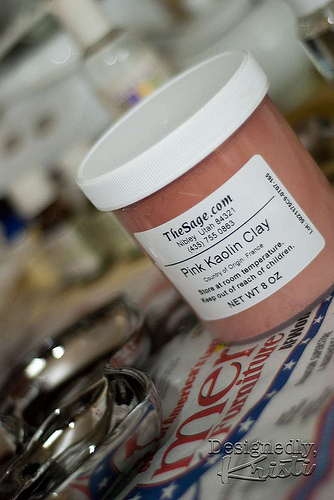
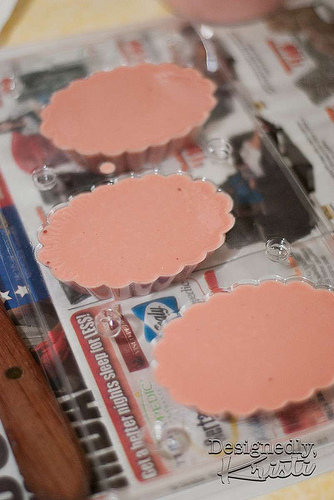
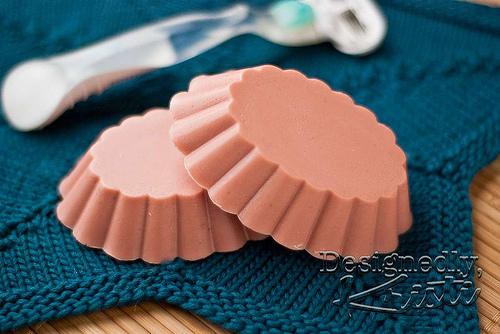
The secret to the shave soap was the use of a clay. The clay helps with the glide of the razor. To get the nice pink soap the clay used was a red Kaolin clay. You just add it into the melted soap base and stir until incorporated. Next time I think I may want to sift it into the melted base as I had a few lumps. The soap works wonderfully for shaving. It produces a really fine lather and I’ve been using it even when I’m not shaving because I love the scent and the feel of it.

Women's Citrus Shave Soap

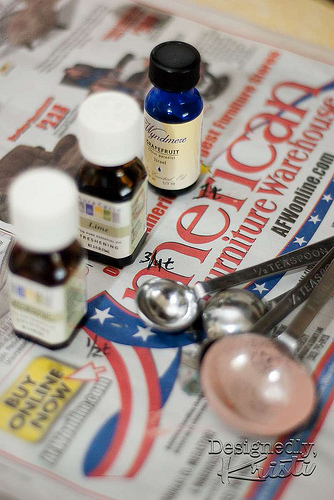
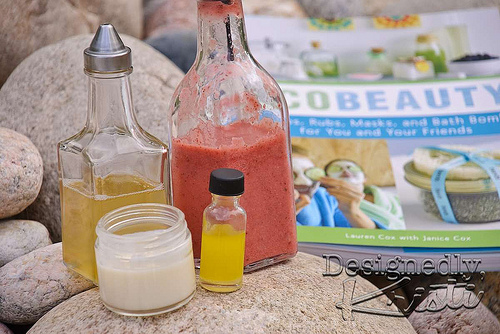
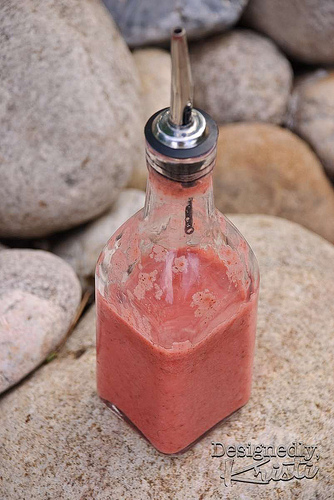
In my lotion bar and soap making experiences so far I’ve learned a handy thing. If you work on newspaper it is very easy clean up. If you drop wax around or dribble a bit non-food save oil the newspaper soaks it up. It also allows me to keep my reference books clean. In the image above you can see I set out my three essential oils that were going into the soap and wrote the amount of each needed right next to it. That way I didn’t accidentally drop some essential oil on the book or that, but I had a reference right there at hand! Even though we do not subscribe to a paper we always have plenty around the house since there is a weekly that one appears to not be able to opt out of. It lands at the base of the driveway like clockwork every Thursday.

Women's Citrus Shave Soap

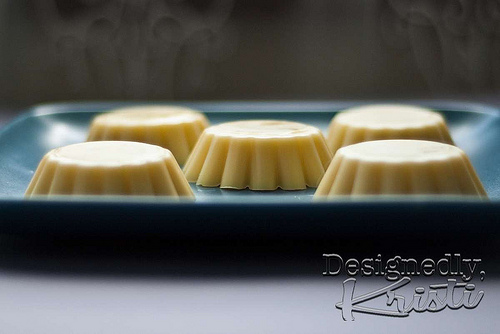
I did make a slight change to the original recipe. It called for lemon essential oil which I did not have on hand when I made this soap (I’ve since remedied that issue) so I substituted grapefruit instead. The other advantage to using grapefruit is that it is the exception to the rule that citrus essential oils make you photosensitive. Since I had the special bergaptene free bergamont the only photosensitizing ingredient was the lime. I’ve since learned that most feel in soaps and such that the concentration is low enough to not be of concern, but given my fair Scandinavian complexion and our mile high altitude I like to be careful in that regard.

Women's Citrus Shave Soap

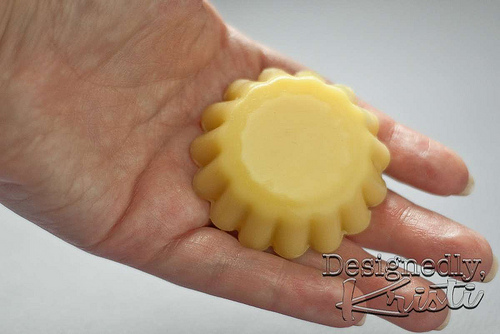
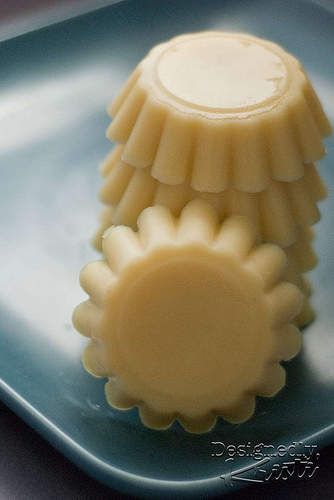
I thought the bars seemed somewhat soft, but I only just finished my first bar yesterday! I started using it the middle of September! That is not bad. While there is some up front cost for things like the clay, jojoba oil and the essential oils (some of which are definitely not inexpensive) I got 8 bars from $2.25 of goat’s milk base (okay, $4.50 if you don’t have a 50% off coupon for Michael’s). Even figuring in the cost of the additives I’m pretty confident that I came in under 50 cents a bar (under a $1 if I paid full price for the base). For 6 weeks of daily showers. It doesn’t get much better than that.

Women's Citrus Shave Soap

Knitter Friendly, Anti-Eczema Lotion Bars

Filed under: Homemade Beauty — Kristi at 5:54 am on Thursday, September 23, 2010

Knitter Friendly, Anti-Eczema Lotion Bar

I’ve been so pleased with the results I’ve gotten from making my own facial care products I thought perhaps the rest of my skin would also benefit from cutting out more chemicals. Going more natural. Knowing 100% for sure what I’m putting on my body. For a very long time now I’ve been plagued with two rather large patches of eczema on my forearms. I don’t know when they first appeared, though I’m pretty sure I did not have them when I lived in Minnesota or North Dakota so I presume it is a result of the drier climate of the Colorado Front Range. Or perhaps my just getting older…

I had recalled reading about blends of essential oils that are purportedly good at calming skin and reducing or even eliminating eczema so I pulled out my aromatherapy book for some guidance and inspiration for concocting my own chemical-free moisturizer. The other inspiration for these lotion bars was one I had purchased at the local farmer’s market a year or two ago. I loved the convenience of the bar lotion, but the bars were too big for me to get through before the oils in them started to go rancid. To be fair, I wasn’t using it as my main moisturizer and not religiously either. But I also thought having a smaller bar that I could perhaps put into a tin and carry with me in my purse or my knitting bag would get used more regularly because it would be readily at hand.

Knitter Friendly, Anti-Eczema Lotion Bar

I did some searching for lotion bar recipes on the Internet, of which there are many. Several claimed to be non-greasy. I took notes and combined those with what I’ve learned about various base oils (unscented or low-scent oils and creams) and essential oils to formulate a version I thought would work well for me. I’ve found the combination of Grapeseed and Jojoba oils work really well at balancing out my skin on my face and never leaves it oily so I used that in place of the often called for Sweet Almond oil (plus, I know I’ll be safe to play with my friend’s children who have nut allergies). For a bar form of lotion some oils that are solid at room temperature were required as well as beeswax. Shea butter is fantastically moisturizing, but can be somewhat soft at room temp but cocoa butter is very solid and also a good moisturizer so I used both of those. I also added a bit of vitamin E oil as it has preservative powers and is extremely good for troubled skin and even helps to prevent scarring. To top it off I used a mix of Ylang Ylang, Lavender and Bergamont essential oils with a very light hand. In fact I don’t think anyone would be able to name the oils used from smelling the bars. I think my hands mostly smell slightly of honey and beeswax.

Knitter Friendly, Anti-Eczema Lotion Bar

I’m quite pleased with the result. The bars moisturize well and have definitely reduced my eczema patches. I suspect if I was a little more diligent about applying it I could possibly clear them up fully. They are still a tad greasy at first application. You have to melt those solid oils and the beeswax base to get it on so that makes sense. It stays greasy as long as you are rubbing it in and creating heat from the friction of rubbing your hands together. But as soon as I stop the rubbing it soaks right in and I’m good to pick up my knitting, or even use the touch screen on my phone. I can feel the effects of an application for hours. Even DH notices when I’ve used it, saying how soft my hands feel!

My First Lotion Bar

Ingredients

  • 2 oz Beeswax, use local if you can
  • 1 oz Shea Butter
  • 1 oz Cocoa Butter
  • 2 T (1 oz) Grapeseed Oil
  • 2 T (1 oz) Jojoba Oil
  • Contents of 3 Vitamin E Capsules
  • 4 drops Ylang Ylang Essential Oil
  • 3 drops Lavender Essential Oil
  • 2 drops Bergamont Essential Oil

Directions
In a microwaveable bowl or measuring cup (I use one dedicated to making beauty products), melt the beeswax, shea butter and cocoa butter. Cook in 30 second bursts and stir just until everything is melted. These products like to set-up when cool, so stir with something that has a small surface area as solids will built up on the stirrer. I use BBQ skewers, you could also use a coffee stirrer or chopstick. Once fully melted add the remaining ingredients - the oils. Pour into molds that have been oiled and let sit until fully set, about 1 hour or so.

Lotion Bars Setting Up

For these I used 39 cent fluted tartlet tins from a big box home store and filled 6. They made roughly 1 oz bars. I really like the size. It fits really easily in the hand and if I find a tin to store them in it should travel well too. I put the extras in the freezer to extend their shelf life, wrapping each individually in a bit of plastic wrap then placing them all in a freezer bag. I did run a test on one and left it in for 4 days then thawed it and it seems to perform the same.

As I mentioned previously, the scent is very light. For a batch this size you could certainly double the amounts if you don’t mind a bit of fragrance and it should increase the anti-eczema properties. I’m sure I’ll tweak the recipe as I become more experienced, but I wanted a record of what I’ve done with this batch so I can build upon my past efforts.

Have you ever made your own moisturizers for you or a loved one with troubled skin? What oils did you find worked well?

ETA: I’ve since discovered that not only is it a good idea for me to leave out Sweet Almond Oil, but some people who are allergic to nuts may also be allergic to the shea butter and possibly avocado oil. So if you are making these for people with nut allergies, be certain to do your own research as to what is safe and perhaps try patch tests of the questionable ingredients on the person it is meant for before making the bars.

REVIEW: EcoBeauty by Janice and Lauren Cox

Filed under: Books, Homemade Beauty — Kristi at 12:52 pm on Thursday, August 12, 2010

EcoBeauty & A Few Things I've Made From It

At more than 150 pages, EcoBeauty: Scrubs, Rubs, Masks and Bath Bombs for You and Your Friends by Janice and Lauren Cox and published by Ten Speed Press, is a great introduction to making your own beauty products at home with natural ingredients. The book is broken into six sections: For the Face, For the Body, For the Mouth, For the Hands and Feet, For the Hair and Gift Giving, each containing 10-27 recipes or projects. There is also an introductory section that covers some of the common ingredients and their beneficial properties as well as sources for them and containers. The final chapter of the book is dedicated to a mix of recipes especially fun for gift giving (i.e. bath bombs and bath salts) and projects that complement the recipes in the book to help make a well-rounded homemade beauty gift. As part of the title suggests there is also some emphasis on the eco-friendliness of making your own beauty products, from reducing chemicals in our waste water to reusing containers of various shapes and forms.

The first author, Lauren, is a UCLA student and daughter of Janice, an established author of homecrafted beauty recipes. It is apparent in much of the text that this book is intended for young women from pre-teen through college age. There is a lot of emphasis on common maladies of teen skin and recipes for reducing aging of skin and hair are sparse. Though I’m in my mid-thirties I did not struggle to find recipes of interest to me, however.

Strawberry Face Cleanser

Each recipe has a brief introductory paragraph describing the purpose of the recipe and sometimes highlighting specific properties of a few of the key ingredients. Most of the recipes use only 2-4 things and mix up quite quickly. Many also keep 1-3 weeks in the refrigerator and are sized appropriately for their lifespan. This makes it pretty simple to dedicate a day every other week or so to prepping your products for the coming weeks. Likely it would take no more than an hour to put together all of your products for a two week period.

So far I have tried four of the recipes - Strawberry Cleanser, Bee Happy Toner, Get-the-Red-Out Facial Mask and Tough as Nails Oil. Despite my age I struggle with acne on a regular basis (got through my early teens just fine, then after a “Glamour Shot” before my senior year in high school I broke out and have never had clear skin since) and the Strawberry Cleanser has made a huge difference in my skin. I still get sizable hormonal breakouts, but the daily smaller whiteheads have nearly disappeared entirely! The strawberries contain alpha hydroxy acids which are in many commercial cleansers to fight acne, but they also contain lots of great vitamins, plus the seeds act as gentle and natural exfoliants. I was complately unaware of honey’s anti-bacterial properties, but that makes it a common ingredient in many of the recipes in EcoBeauty. It plays a role in both the Bee Happy Toner and the Get-the-Red-Out mask which I think both work well for me in combination with the strawberry cleanser. I do find the toner to be a tad sticky so safe it for nighttime use only. The nail oil is definitely helping me in my fight to keep my fingertips and cuticles hydrated and smooth despite my handling of massive amounts of fiber, gardening and cooking and canning.

Homemade Beauty Products

I’m sure a good share of these recipes or ones quite similar can be found pretty readily on the Internet. That said, there is something nice about knowing right where to go and finding what you are looking for so I am glad I bought this book when I saw it on the shelves at Old Firehouse Books. There are many more recipes I’m going to be exploring in the future - Oh Soy! Cleanser, Not Your Grandmother’s Toner & No More Cottage Cheese Thighs, to name just a few. There are shampoo and conditioner recipes in there too that I’m not yet quite brave enough to try. The same is true of the natural nail polish.

EcoBeauty

This may have been one of those books that I should have taken for a test drive from my local library before purchasing. This is a new genre of DIY book for me so I am not familiar with what else is out there, but a book that wasn’t so obviously targeted to the teen and early twenty-somethings may have been a better fit. That said, I love books and especially books that inspire. The photographs in here are large, clear and expertly styled and lit so give my photography bent this book does inspired in two ways and thus worth the price for me. If you are thirty or older you may wish to give this title a pass or at least peruse it fairly thoroughly before buying. If you are shopping for a DIY or ecologically-minded teen or twenty-something, I suspect this book would not disappoint. My appetite for making my own beauty products has been whetted and I think I will be looking into other books on this topic that are less skewed towards younger women.

Note: I purchased this book at a local bookstore. I was not paid or gifted the book for review by either author nor by Ten Speed Press. The opinions in this review are my own.