Tutorial: Right Cabling Without a Cable Needle
Wooooosh! That was the sound of October passing me by. Time is just flying right now and I’m sure it will seem that way through the rest of the year with all the holiday hub-bub. I’m a bit later than planned posting here. I’m furiously finishing off the last Nourishing Knits project for the final photoshoot this weekend! But here is the other cabling with out a cable needle tutorial I promised.
Two weeks ago I shared the way I like to cable without a cable needle, but I only showed you how I do it for left twisting 4-stitch cables. Today I’ll show you how I do it for right twisting 4-stitch cables or cable 2 right (or back).
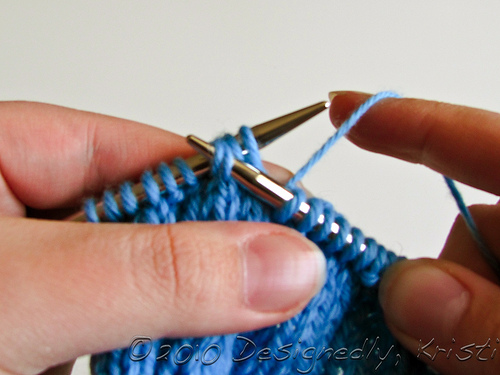
Step 1: Take the right needle tip in front of the left needle and place it through the third and fourth stitches on the left needle as if to purl.
Step 2: With your left index finger apply some pressure to the base of the 1st and 2nd sts and remove all four stitches from the left needle.
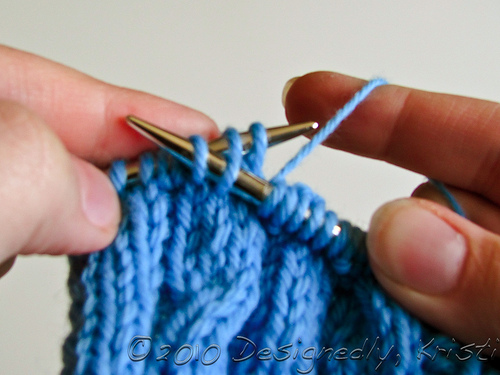
Step 3: Slip the left needle through the two loose stitches from left to right so they are mounted normally on the needle.
Step 4: Pass the first two stitches now on the right needle back to the left needle. It looks kind of disorganized and the stitches may be somewhat distorted. They may also seem quite tight. This is normal.
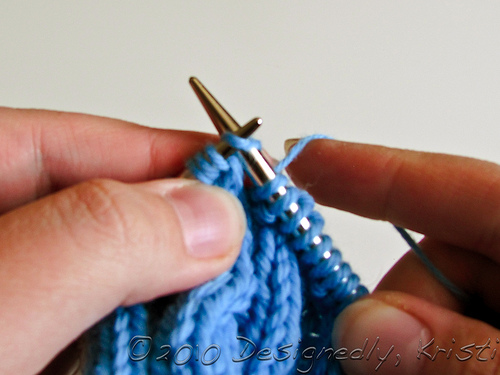
Step 5: Knit the four newly reordered stitches and the cable is complete.
You should be able to see the direction the stitches are twisted before you even knit them. It is good practice to take a look at this stage to make sure you did cross them in the proper direction before you knit them. It is easiest to fix the cable before it is knit.