Fiber Fool

Follow the feats and foibles of a fiber fanatic.

Tutorial: Right Cabling Without a Cable Needle

Filed under: Knitting, Tutorials — Kristi at 9:19 am on Thursday, November 3, 2011

Wooooosh! That was the sound of October passing me by. Time is just flying right now and I’m sure it will seem that way through the rest of the year with all the holiday hub-bub. I’m a bit later than planned posting here. I’m furiously finishing off the last Nourishing Knits project for the final photoshoot this weekend! But here is the other cabling with out a cable needle tutorial I promised.

Two weeks ago I shared the way I like to cable without a cable needle, but I only showed you how I do it for left twisting 4-stitch cables. Today I’ll show you how I do it for right twisting 4-stitch cables or cable 2 right (or back).

Cable 2 Back (or Right) Without a Cable Needle Step 1

Step 1: Take the right needle tip in front of the left needle and place it through the third and fourth stitches on the left needle as if to purl.

Step 2: With your left index finger apply some pressure to the base of the 1st and 2nd sts and remove all four stitches from the left needle.

Cable 2 Back (or Right) Without a Cable Needle Step 2

Step 3: Slip the left needle through the two loose stitches from left to right so they are mounted normally on the needle.

Step 4: Pass the first two stitches now on the right needle back to the left needle. It looks kind of disorganized and the stitches may be somewhat distorted. They may also seem quite tight. This is normal.

Cable 2 Back (or Right) Without a Cable Needle Step 3

Step 5: Knit the four newly reordered stitches and the cable is complete.

You should be able to see the direction the stitches are twisted before you even knit them. It is good practice to take a look at this stage to make sure you did cross them in the proper direction before you knit them. It is easiest to fix the cable before it is knit.

Tutorial: Left Cabling Without a Cable Needle

Filed under: Tutorials — Kristi at 3:31 pm on Thursday, October 20, 2011

Over the years of teaching I’ve amassed a collection of step-by-step photos and text and I think it is time to share them with the wider world. First up, is how I do left twisting cables without using a cable needle.

I always tell my students who are new to cabling that it is nothing more than an organized way to knit stitches out of order. Most commonly one uses a cable needle to aid in working the stitches in a different order, but anyone who has done long term cabling projects knows those pesky cable needles like to run away and hide! Even if you do not wish to embark upon a full project dedicated to cabling without a cable needle, knowing how can get you out of a bind if you happen to loose a cable needle while out and about. Today I’ll share how I like to cable without a cable needle to make a basic 4-stitch left twisting cable sometimes called “Cable 2 Front (C2F).”

Cable 2 Front (or Left) Without a Cable Needle Step 1

Step 1: Take your right needle tip and bring it behind the left needle and pass it into the third and fourth stitch on the left needle as if to purl.

Step 2: Take your right thumb and place pressure on the first two stitches on the left needle and kind of pinch them to keep them from dropping. Then slip all four stitches from the left needle.

Cable 2 Front (or Left) Without a Cable Needle Step 2

Step 3: Insert the left needle tip through the 2 loose stitches you are pinching with your right thumb. The tip should enter them from left to right so they are mounted normally onto the left needle.

Step 4: Slip the 2 stitches on the right needle back to the left needle. It looks kind of disorganized and the stitches may be somewhat distorted. They may also seem quite tight. This is normal.

Cable 2 Front (or Left) Without a Cable Needle Step 3

Step 5: Now knit the newly reordered stitches normally. You should be able to see that two stitches cross to the left in front of two stitches. This forms the left twisting cable.

While I demoed a very specific cable, the same process applies to left twisting cables of any size. I used this technique in many of my designs with varying types of cables, including Buttercream gauntlets, Challah socks, Cornucopiacowl, Laridae mittens, and Three of Diamonds socks to name a few.

Come back next week for Right Twisting Cables Without a Cable Needle!

Making Butter

Filed under: In the Kitchen, Tutorials — Kristi at 5:21 am on Wednesday, January 5, 2011

A while back I tweeted that I was making butter. It illicited more responses than almost any other tweet I’ve posted. All kinds of people came out of the woodwork to ask me how I did it. It is quite simple and the results are delicious!

Pouring Cultured Cream Into Mixer

We get local cream in glass quart bottles from a local dairy. It is much more economical than buying the cream in the grocery store, supports our local economy and has traveled many fewer miles. Often when we order cream whatever recipe we have in mind does not use a whole quart. If we’re getting to the end of the cream’s shelf life and haven’t made use of it we’ll make butter with the left overs. Here we used the whole quart as we took it with us to DH’s family Christmas to and had it on our morning waffles.

You should be able to make butter with grocery store cream if you do not have a local source, though I suspect you would want to avoid the “ultra pasteurized.”

This was our first time making cultured butter, but I think we’ll be taking that extra step more often. It is not required though. I’ll be certain to note any differences between using cultured cream vs fresh cream.

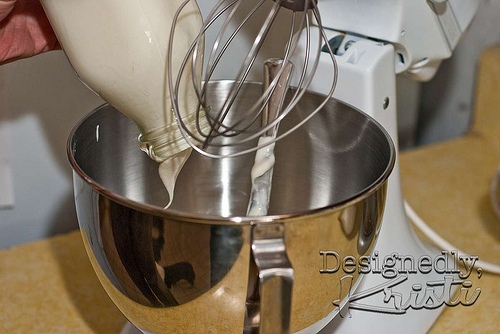
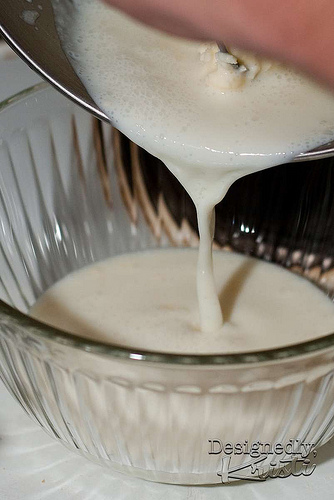
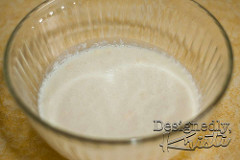
To culture the cream we added 1 packet of cheese making mesophilic culture that we purchased from our local homebrew shop to 1 quart of cream from a local dairy and let it sit at room temperature overnight. This really thickened the cream and made it a tad of a challenge to get out of the bottle. Next time I would likely inoculate it in the mixer bowl and cover it with plastic wrap.

Whipping the Cream

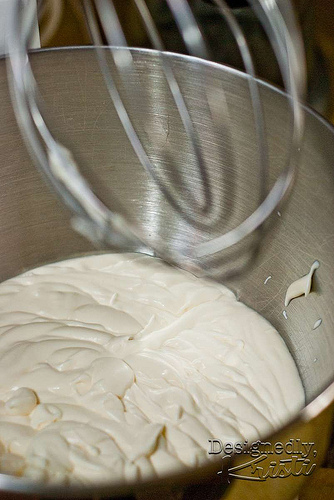
You’ll begin just as you would if you were making whipped cream. In a stand mixer with a whisk attachment beat it at medium high speed or so.

The Whipped Cream Yellowing

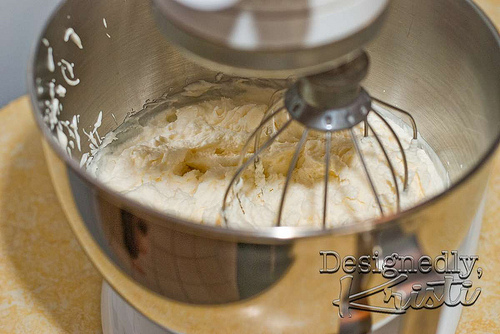
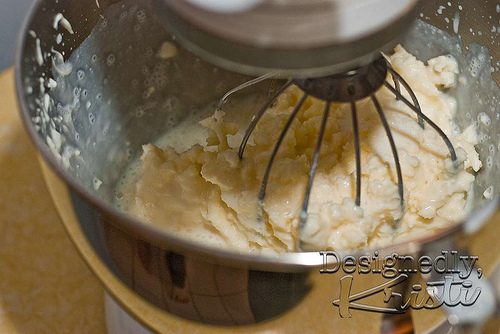
Unlike whipping cream you’ll want to continue whipping past the soft peak stage and let it break. It’ll start turning slightly yellow before it totally breaks. Once you see hints of yellow stick close as it will move fast through the following stages.

Buttermilk Just Starting to Come Out

Once you see a bit of liquid separating from solids and are getting splatters on the edge of the bowl turn down the mixer speed a couple notches. If you don’t slow it down the butter will start sloshing around in all the released liquid and you’ll have buttermilk all over your kitchen! Ask me how I know… LOL!

Lots of Buttermilk Has Come Out

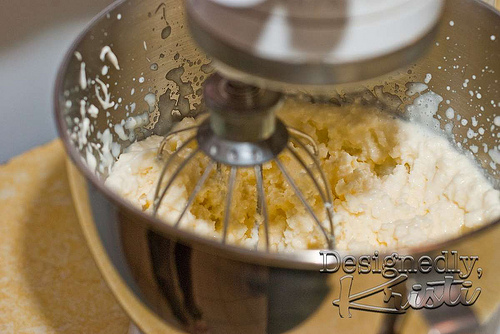
More and more buttermilk will come out from the butter solids. As that happens keep turning down the speed of the mixer.

Nearly Done "Churning" the Butter

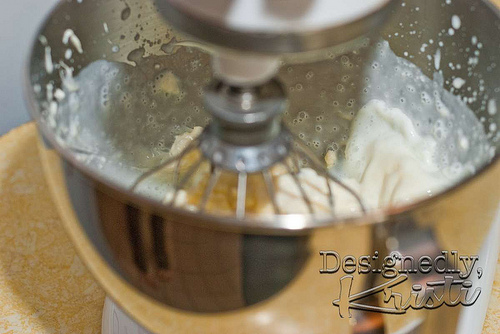
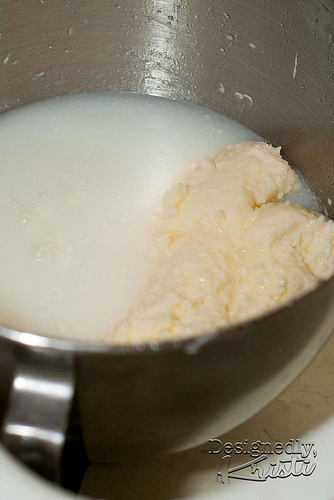
Once most of the butter solids have collected in the whisk attachment you are done with the “churning.” We were surprised to discover that culturing the cream really sped up this part of the process - it took only about 5 minutes or so in the mixer.

If you have not cultured your cream it takes more like 20-25 minutes. It will likely feel like you are making no progress for some time, but just let the mixer keep going. Don’t go too far away or allow yourself to get distracted!

Strain Off the Buttermilk

Now drain off the buttermilk into another container. The buttermilk can be used in baked goods like bread or scones or even in buttermilk pancakes. If the recipe specifically calls for buttermilk and you did not culture the cream you will still need to use a splash of vinegar to “sour” it as you would to sour milk for use in place of buttermilk. If you cultured the cream your buttermilk is already cultured and you are good to use it as is.

Washing the Butter

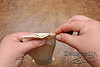
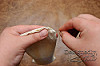
Buttermilk has a much shorter shelf life than butter. To keep the butter fresh longer you need to “wash” it to remove all traces of the buttermilk. To do this, form the butter solids into one ball, then add cold water to fully cover the butter and knead it like you would dough while keeping it in the cold water. Strain off the water and repeat until the strained water is nearly clear. On the last round of rinsing, add ~1/2 teaspoon of salt which will enhance the flavor a bit and also help extend the shelf life. Typically I wash and drain the butter about 4 times. The heat of your hands will cause some butter to melt and enter the rinse water so you won’t achieve a completely clear rinse.

Cultured Butter Cultured Buttermilk

With cultured cream we ended up with roughly a pound and a half of butter and probably about a cup and a half of buttermilk. When using plain cream we typically get less butter and more buttermilk.

Homemade Cultured Butter on a Saltine

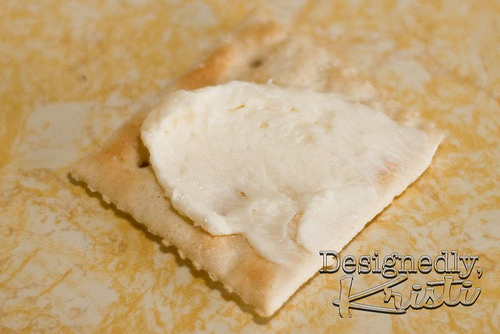
I like to taste test the butter on a saltine. Grandma often buttered saltines when we had soup at her house. It was not something we did at home so it always seemed like a bit of a treat. It is even more so with our own homemade butter on one!

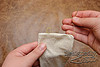
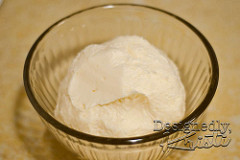
We just put all the butter in a covered bowl this time as we took it to share at Christmas. I usually split it in half and roll them into logs which I wrap with wax paper. One log is often frozen since we don’t go through butter terribly quickly. We have made butter enough now to look into butter molds, but so far we haven’t found ones that would allow us to make non-decorative butters in less than a pound. With only two of us we do not want a 1 pound block of butter. That would be even less convenient than the logs are.

It does taste much fresher and different than store bought butter. The difference is more than I had expected. It is not hard to find excuses to slather it on things like bread, french toast, scones, english muffins, baked squash and more. In some ways it feels like you aren’t taking full advantage of this great butter if it is in something with a bunch of other ingredients that will mask its flavor. That said, I have on occasion added herbs from our garden to a partial batch to make a compound butter. It makes a nice little hostess or thank you gift!

I can’t help wondering how wonderful sugar cookies or shortbread might taste with it. So far I haven’t trusted using the homemade butter in baked goods though. I’m not certain it would match commercial butter in its fat and liquid content and that could really throw off a baked good. I’m getting close to giving it a go though. I’ll probably start with something where the butter doesn’t play a super crucial role. I’ll stay away from pie crust or scones with it for a while. Have any of you used homemade butter for making baked goods?

Monday Linkity!

Filed under: Tutorials, Linkity — Kristi at 2:03 pm on Monday, October 18, 2010

Weavette Sachets

Yes, it is a bit early for Christmas, but if you’re going homemade it is never too early. There are only 67 days left! I believe only 45 until Hanukkah! Long-time readers may remember when I made these lavender sachets back in 2006. Well, I put together a much more detailed tutorial for the Rhythm of the Home blog as it can be a great cooperative project for the whole family. It is a wonderful chance to learn both weaving and sewing while using up scraps of fabric and yarn. And, the final products makes a nice ornament or something to tuck in with some handknit woolens. I even like to use them in place of bows on presents! So go check it out!

Crafty:

Yummy:

Photography:

If you can’t tell, I’ve gotten a bit caught up on my blog reading, but not so much in the photography category :-)

Halloween:

Humor:

I had a fairly pleasant weekend. I stayed out of sick and studying DH’s way a good chunk of Saturday, attending the last French Nest Market and lunching with Amanda, Sue and Nancy. We watched Charade and I knit a tiny bit as my fingers that I cut on Monday are starting to heal. Then on Sunday we watched another movie, the name of which is oddly escaping me right now and I caught up on my DVR’d shows and knit a *ton.* Though the band-aids really do slow me down.

What did you do this weekend?

Save Money & Make Your Own Eye Pillow

Filed under: Sewing, Tutorials — Kristi at 5:06 am on Friday, August 13, 2010

Flax Seed and Lavender-Filled Eye Pillow

Around here we love giving (and receiving) handmade gifts. Most often the gifts we give to our family and friends are a product of our kitchen and occasionally also from the garden. This year one of the gifts that will be given are these lovely little lavender and flax seed eye pillows. It is a great gift that uses several of my skills - gardening, sewing and knitting! And who doesn’t have someone on their list who could use some relaxation?

I designed the amazingly soft eye pillow cover using Blue Sky Alpacas’ Alpaca Silk yarn and used a simple brocade pattern to adorn the center. It is a great project for getting your feet wet with seaming as it has two short seams - perfect for practicing! The pattern is going to be a part of My Sister Knits’ August newsletter (which has been delayed due to some computer difficulties). In the meantime I thought I’d share how I made the insert.

Materials

  • A 10.5″ x 7″ piece of cotton fabric, choose something pretty if you wish to skip the knit cover
  • Coordinating Sewing Thread, I used contrasting here so it showed up in the photos
  • Hand Sewing Needles
  • Sewing Machine (optional)
  • Wide Opening Funnel (optional, paper can be rolled into a cone to form a funnel instead)
  • Approximately 1 Cup Flax Seeds
  • Approximately 1/4 Cup Dried Lavender

Directions

Fold Fabric in Half the Long Way with Right Sides Together

1). Fold piece of fabric in half lengthwise, with right sides together. Pin as needed.

Sew Edges

2). Sew along all three open sides with a 1/2″ seam allowance, leaving an opening in one of the short sides for turning the pillow right side out and filling. You can do the sewing with a machine or by hand. If you are using a rigid funnel be certain your opening is large enough to accommodate it. I prefer to leave my openings in the middle of a side so I have a strong foundation for sewing the opening closed later.

Fill Pillow

3). Turn pillow case right side out and fill. You want to fill it only about 2/3 full so there is plenty of room for the contents to shift and allow the pillow to drape nicely over your eyes. For this 9.5″ X 3″ pillow I used roughly 1 cup of flax seeds and 1/4 - 1/3 cup dried lavender from the garden. You can use any combination of “grain” such as rice or buckwheat in place of the flax seeds and any dried herbs or flowers in place of the lavender.

Use the Hidden Stitch to Close Pillow - 1 Use the Hidden Stitch to Close Pillow - 2 Tie Off Thread and Trim

4). Using the hidden stitch, sew the pillow closed.

Basic Eye Pillow

That’s it! It is quite simple and economical to make. You probably just saved yourself $30 or more by making it yourself since most commercially available eye pillows are made with silk. You can make them with silk too if you do not wish to make the knit cover. I have to confess that with two dogs I like being able to wash my covers though!

The pillow insert can be chilled or heated gently in the microwave (probably 1 minute or less is required in most microwaves) to provide just the comfort you need.

Lavender & Flax Seeds

If you suffer from headaches try using peppermint and eucalyptus. Lavender helps promote relaxation and sleep as does chamomile. Bergamont and citrus peels will energize. You can easily make 4 pillows from one fat quarter of fabric, so why not make several different scents so you have just the aromatherapy you require on hand?

Keep your eye on http://www.mysisterknits.com/community/news for the August 2010 link to show up to get the knitting pattern for the cover. Or, sign up for their newsletter (a link is on their front page) and get notified by e-mail.

Next Page »