FO: Woven Sachets
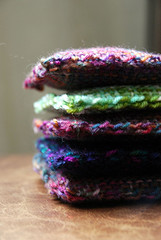
It seems I often have bits of sock yarn lying around. Often not quite enough for baby socks, nor did I know a baby until this past week. So, when I first got my Weavette for my birthday I started just weaving squares now and again from the left over sock yarn. The weight seems about right most of the time and it is very interesting to compare how the yarn looks knit versus woven in a single strand. I always leave an extra long tail at the end to allow for seaming.
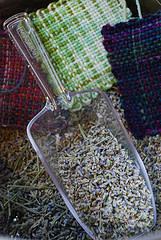 Now, I started to accumulate quite the collection of squares. So, I asked a friend of ours if she would have any lavender from her garden to spare in exchange for some sachets. She hooked me up with enough to fill probably 30 - 40 sachets. Since the lavender is just going into sachets I didn’t get too picky about stems being in there as they too carry the essential oils that release the lovely scent. So, I took the large paper bag that she gave me the lavender in and stapled it shut then stomped on it a bunch. I pulled out the larger pieces of stem that didn’t break down during the stomping. Then it was time to begin the inner packets to hold the lavender.
The loom I have is 4 inches and the final squares are about 3.5 inches once removed from the loom. So, I took some scrap cutain liner (muslin or other tightly woven scrap fabric will do) and cut it into forty 3.5 inch squares. I then sewed two together with a 1/4 inch seam allowance and left about 1 - 1.5 inches open on one side for turning and filling. I clipped the corners before turning right side out. Then I pressed them.
Filling these are a bit of a challenge. I used a sheet of paper for a funnel and gently shook it and the pillow together until they were comfortably full. I did not want bulging sachets and I wanted to be able to machine stitch them closed. Once filled I sewed over the open end very close to the edge to close. Since they will be covered there is no need to take the added time to hand stitch them closed.
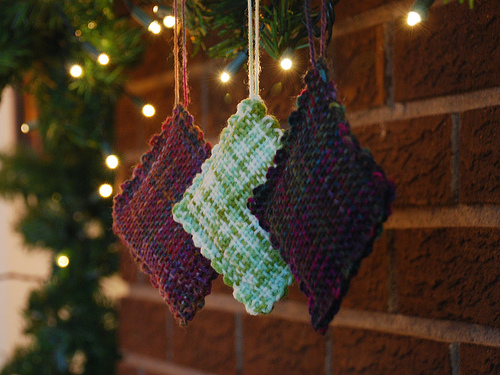
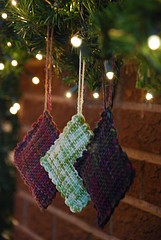
 To cover, take two weavette squares and turn one so you have the longer tails at diagonal corners. Then using a tapestry needle just start stitching the two squares together. Because you are using the yarn from making the squares the stitching is nearly invisible. I try to get two sides stitched from one tail, then I open it up slightly and weave the end in and then start stitching the third side with the other long tail. Once the third side is done, tuck in one of the muslin packets and stitch the fourth side shut. When I get to the final corner I like to make a little loop from the tail(s) using a square knot. That way it can be hung from a hanger or nail in a closet or bathroom, or it can be tucked into a drawer.
 You could also fill the muslin bags with cedar shavings or a blend of cedar and lavendar to ward off moths. To just add a nice scent to a room you could use any fragrant dried flower or blend of flowers or even whole spices. Try roses, chammomile, orange blossoms, peppermint leaves, eucalyptus, juniper, bay leaves, cloves, all spice, cinnamon, or even tea that is past its drinking prime.
You can use any shape or size of the Weavette or Hazel Rose looms. Just cut your muslin pieces to match the size of the woven pieces once removed from the loom and sew with a 1/4 inch seam allowance and you should have plently of room to give a nice finish to the sachets.
Now, if only I could locate my Weavette book so I could play with some other textural weaving patterns! *sigh*