Fiber Fool

Follow the feats and foibles of a fiber fanatic.

Long Time No Patterns…

Filed under: Knitting, Finished Objects, Knitting Patterns — Kristi at 11:45 am on Monday, June 7, 2010

Simple Shrug Needing Name

Sorry for the long silence. It seemed I wrote many blog posts in my head. In some cases I even took the photos for them, but they somehow didn’t get written. Where are those blog gnomes when you need them?!

Simple Shrug Needing Name
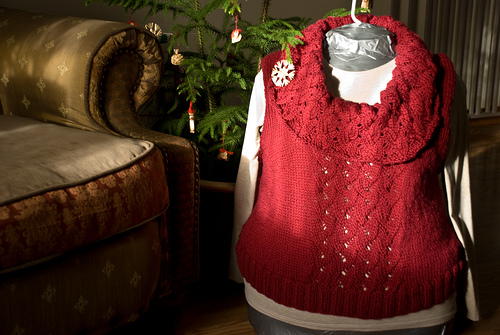
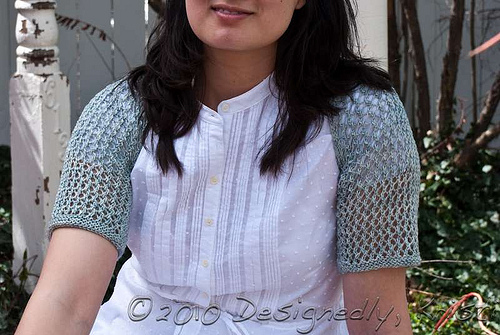
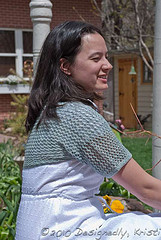
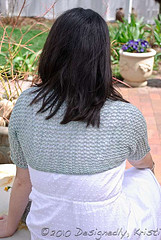
I’m working on some collections for fall and winter so it is pretty much nearly all secret knitting around these parts which means knitting posts are pretty much nonexistent. Except of course the patterns I design with yarn from My Sister Knits for the newsletters. Up above and to the right is May’s free pattern - Cirrus. It is a simple all in one, no seaming, side-to-side shrug that is completely customizable to your own particular ration of across back width and upper arm circumference. The pattern is still available for free on page 3 of the May 2010 newsletter at the My Sister Knits Community News page.

Simple Shrug Needing Name
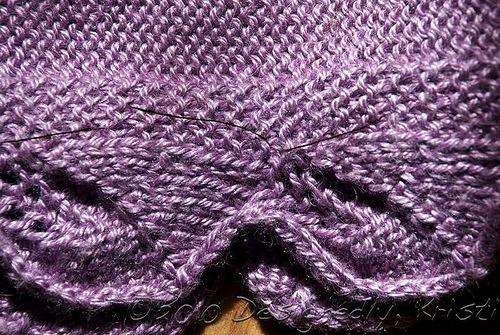
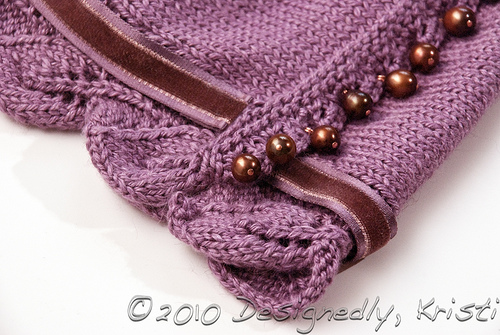
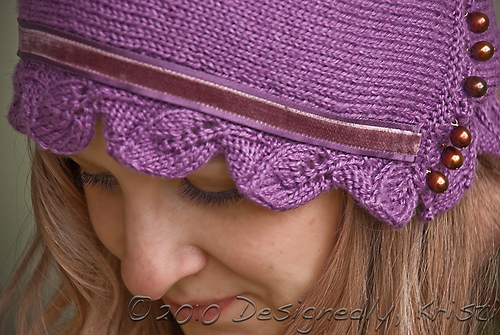
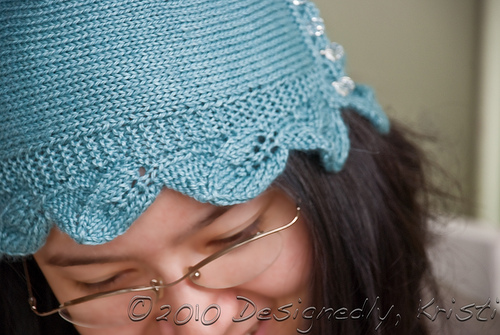
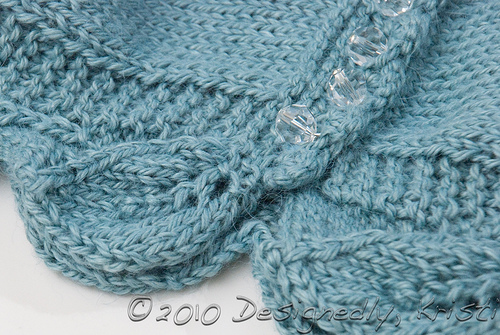
The stitch pattern is a small, two-stitch repeat with two pattern rows in the vertical repeat so it is simple to memorize, a pretty simple lace for those new to lace knitting or a great KIP or TV-watching project for those more experienced with lace knitting. This open faggoted lace often does a great job of mixing up higher contrast colors of handpainted yarns too. I put a small gusset at the transitions from sleeve to back so that the edges on the flat section are self-finishing and it gives just a tad more wiggle room for getting the shrug on and off.

This one was knit from Madelinetosh tosh sock yarn in the Nostalgia colorway and for the small size pictured here took only about 3/4 of a 4oz skein. The pattern contains four sizes based on garment sizing standards if you are knitting it as a gift and don’t have exact measurements and takes 275-500 yds of fingering weight yarn. There are notes on how to make adjustments and you could also easily make longer or fuller sleeves as well. Just don’t forget that any changes you make will impact the yardage you require!

I’m hoping things will slow down around here sometime this summer so I can whip one up for myself. It slips into a purse so easily so it is at the ready when AC in restaurants and such gets to be too much. One can even keep the seam to the inside and wear it as a tube scarf if only the neck is chilled!

The Errors of Not Calculating My Own Numbers

Filed under: Knitting, Apparel, Designing — Kristi at 4:09 am on Monday, April 5, 2010

Aralia by The Tree

Remember my “Christmas” sweater from December? Well, it never became my Christmas sweater, not even for the delayed MN Christmas. I should have known that there were still major problems even after recalculating my own sleeve cap numbers. Whenever I procrastinate on something it is a real sign of a problem. The fact that I kept putting off sewing the sleeves on should have tipped me off. I am probably about 80% product knitter and 20% process knitter. When I near the end of a project, especially a larger one, the sight of the finish line propels me forward - often to put in crazy hours.

The Errors of Not Questioning The Errors of Not Questioning

Despite the unflattering appearance of this sweater I thought some of you may appreciate the problems that make it unflattering. I had a nice round gauge with the Cascade Eco+ I was using. Since time was of the essence if I was to wear it for Christmas I decided to follow some pretty standard numbers when knitting it. I knew my basic measurements (bust, waist and hips) but I did not bother to measure a sweater that fit me in a similar fashion as I was envisioning my Aralia sweater. I just knit onward and while I occasionally voiced my concerns as I was knitting the body it seemed to look okay on Kurki (my duct tape dressform) and friends and family gave it the okay when I tried it on without the sleeves.

The Errors of Not Questioning

In hindsight, I suspect the numbers for larger circumference sweaters in my source skew towards men once a certain chest measurement is reached. At what point the scales tip I’m uncertain, but definitely at 48″ it is skewed towards a male frame. The armholes land almost a full 4 inches below my actual armpit. Combine that with my pretty severe short waistedness and I had set-in “dolman” sleeves that came out of my waist. This hides the slimmest part of my body. There was a pretty good hint that those armholes were going to be a problem when the sleeve cap knit as written came out to be almost a foot long! I recalculated and got that down to about 8 inches. But even for a plus sized sweater that seemed a little over the top. These also caused the bust short rows I put in to not be placed properly and I still end up with the upside down “U” framing my gut in a most unflattering way.

Another problem is the shoulders. They too wide - by about 2″ (clearest in the right portrait oriented photo above). The shoulder seam lands quite a ways down my shoulder. Even fixing just that (with the help of friends to pin it in place, sorry I had no camera handy at that time) made a fairly big difference in the look of the sweater as well. This was one place where Kurki failed me and I failed myself. Because they are stockinette stitch, the shoulder edges curled and I never tried blocking them out or unrolled them when the sleeveless sweater was tried on. Otherwise I would have likely figured out that the across back measurement of the sweater was probably nearly a full 4 inches wider than my body’s.

I’m abandoning this one. At least for now. A different formation of it may make an appearance come fall and the return of cooler temperatures. I had already pushed off some other more pressing projects to get it to this point and I can’t really give it anymore time right now. Plus, I’m thinking the cowl at this sort of gauge didn’t help make it flattering with my chest (it might be fantastic on my sister though). I think I’ll stick to finer gauge cowls on my sweaters in the future.

Speaking of the future, some things I’m going to be certain to do when designing specifically for my body - have handy the most current measurements and more than just your standard chest/waist/hips circumference and arm length. I’m going to also have my armhole depth, nape to waist, nape to high hip, nape to full hip and across back width. Quite probably above and below bust chest circumferences. Oh, and for calculating the short rows (I have a spreadsheet that I use so those measurements were taken into account here as they were already recorded) - neck to waist at the front to compare to nape to waist in the back. I will also quite likely measure some of my sweaters and shirts to get a better ballpark - even if they don’t fit ideally they will give me a jumping off point as well as checkpoints along the way. And lastly, I hope I listen to myself better the next time I procrastinate!

New Equipment, New Photos and New Sur la Tête

Filed under: Knitting, Photography, Sewing — Kristi at 4:02 am on Monday, March 15, 2010

Spring Sur la Tête Hats

After discovering how cute Sur la Tête was when knit with positive ease rather than the standard 10-20% of negative ease usually used for hats, both Amanda and I wanted hats one size larger. Since our originals were in relatively “winter” colors we opted for spring colors for the second round. I used lunch at a local brew pub as a bribe for Jess, my sister-in-law, to come up with her boyfriend and model my hat while Amanda modeled her own.

Spring Sur la Tête Hat

When we were first scheduling the shoot the weather looked like it was going to be bright and sunny and timing was looking to be at nearly midday. I took that as the excuse I needed to finally invest in a proper 5-in-1 Diffuser/Reflector. I had been using my windshield visor from my car as a reflector, but I did not have a way to diffuse sunlight if any of our locations were to be in direct light. When I took the lighting class from Joe Coca he had made some fantastic diffusers with canvas stretching frames and mylar but I didn’t think a parent sized sheet of mylar would be large enough to cast shade for both Jess and Amanda in one shot so I decided it was time to retire my hacks and get a proper 5-in-1 Reflector in a largish size - 43″.

Spring Sur la Tête Hat

As it ended up, it was very overcast and rather chilly (had to tone down a red nose more than once in post-processing since we were out and about for nearly 2 hours). I was sort of disappointed since the original hats were also shot on a gray day (with snow). But, since I had my new reflector I was able to simulate sunlight a tad by using the gold surface to bounce my flash off of (the two pictures above). In that respect the weather was great and I never had to worry about the mile-high sun and the harsh and unflattering shadows it can cast around here. I did miss my usual assistant (DH had deadlines for work and mid-terms for grad school approaching fast) though so I did not put it to use as much as I would have liked. There are stands you can use for them, but with the 43″ size the slightest breeze will catch it so that was not an option last weekend. Though I think a stand is the next thing on my affordable wishlist as it would come in handy when I’m shooting in the house, that and a stand for my flash unit too, and… and… LOL!

Spring Sur la Tête Hat Spring Sur la Tête Hat

You may note that I opted to add a touch of embellishment to my hat. I put a satin and velvet ribbon that I got at The Berry Patch in Niwot around the brim of my hat over the garter stitch section. Doing so added an almost slouch-like effect to the fit creating a third look! It took a bit off pondering and asking for input from many friends to decide how to attach the ribbon. I ultimately went with Deb’s suggestion to zig zag across the width of the ribbon and tack not too frequently. If you look at the image below you can see the inside of the hat where I’ve enhanced the thread to make it show up a bit more. I ended up tacking at the top transition between the satin and velvet at the middle of a leaf at the bottom transition at the end of the leaf all the way around. I still wonder if I was infrequent enough. I did leave a tad of slack in the thread so there is a bit of play in the ribbon as the knit fabric stretches.

Inside of Sur la Tete

And from the front both off and on…

Spring Sur la Tête Hat - Detail

Spring Sur la Tête Hat

Amanda’s is currently unadorned, but she has some big plans involving both ribbon and beads. I’m very intrigued to see the final result. She did opt for crystals for her buttons instead of pearls and it creates a fun and light look great for a spring or Easter hat…

Spring Sur la Tête Hat

Spring Sur la Tête - Detail

Despite the clouds and cool weather I think we had a good time wandering around Old Town.

Spring Sur la Tête Hats

Big Weekend…

Filed under: Knitting, Photography, Travel — Kristi at 12:02 am on Tuesday, March 2, 2010

This weekend was a full weekend. I took an all day photography workshop with Joe Coca here in Fort Collins (if you look at the “Things” category you may recognize a shot or two) about studio lighting. It was taught through the Center for Fine Art Photography. In the morning we walked through a few examples of lighting, some just virtually by stepping through all the various shots for a Handwoven magazine photoshoot. For one of the real time examples of studio lighting he walked us through he used my latest WIP! That was fun to see the process of deciding upon the lighting and how subtle changes highlight different aspects of the yarn or needles. In the afternoon we were broken up into groups and had to style and light a shot.

I think the biggest thing I learned was that I mostly know what I need to know (that was worth its weight in gold I think). I just need to be more patient and make sure I take the time to let my brain go through all of that. Oh, and if I’m working in a group I need to actually say what I’m thinking, not just think it and let them continue running farther off the rails. And, I could use an assistant and many more stands with clips and some lights, and the software to do live capture and,…and,… LOL!

Then Sunday I went on a mini road trip with Amanda to Niwot to visit The Berry Patch in search of the perfect finishing touch for my latest WIP and few secret FOs that needed some additional accoutrements. This was only my second time there, but I think I could spend vast amounts of money and time in that store. It is definitely healthy for the checking account to go there with very specific goals in mind, as well as a friend who can slap some sense into you when you start contemplating how much you can save in a month by eating only peanut butter toast to afford $72 worth of buttons for a project!

Unfortunately, Sunday is not the optimum day for road tripping as many of the stores of interest are closed - yarn, bead and fabric stores. Because of that we didn’t venture on to Boulder. On the way back home we did stop in at Bead Lounge in Longmont where they were having a one day trunk sale and we scored the very finishing touches was well.

It seemed only fitting to practice a little of what I learned on Saturday to capture some of the goodies from Sunday on Monday and share them on Tuesday :-)

FO Friday: Sur la Tête

Filed under: Knitting, Knitting Patterns, Designing — Kristi at 12:55 am on Friday, February 26, 2010

Sur la Tête - Modeled

As I mentioned in the teaser earlier this week, I have a new pattern and it is now ready for the general public! Meet Sur la Tête which I knit back in October if memory serves correctly. It was one of those ideas that hit me one night as I was starting to drift off to sleep. It got me so excited I had to get up and sketch it and start pulling together some of the pieces so I could actually sleep. It then took another several months before I settled on the perfect yarn and sunk my teeth into the actual design process.

Sur la Tête - Crown & Button DetailIf you look closer at the crown you can see a slight spiral. The hat is knit from side to side and uses short-rows to form the fully fashioned crown. I chose to knit this side to side so I could use a fun little scalloped edging to automatically create the buttonholes. It also allowed me to use a really great edging motif that you knit as you knit the body! The edging is so great that while I was finalizing test knitting and editing on the pattern two great shawlettes were released that would coordinate quite nicely with this hat — Cedar Leaf and Saroyan.

I had a lot of great help in finalizing Sur la Tête. Amanda not only kindly modeled the hats for me, but she bravely took the first run (the red one pictured) through the pattern before I handed it off to Ann, Anne, Chris and Mia to try out. They provided me with some fantastic feedback and were lightning quick knitters. Unfortunately the weather was a bit against us in getting the final pictures taken which delayed release by a couple weeks. But we managed finally and had great conditions - lots of fresh white fluffy stuff to brighten the gray day while more white fluffy stuff fell from the sky for ambiance.

Sur la Tête - Modeled Sur la Tête - Modeled

In testing the pattern it became evident that the amazing drape of Blue Sky Alpaca’s Alpaca Silk yarn allowed two hat styles in one pattern depending upon the fit you chose. If you knit the pattern to have the standard 10% negative ease you get a beanie-style fit (see red hat above), but if you choose to knit one size larger than your head circumference you get a cloche-style fit. The difference isn’t quite as pronounced in the photos as in real life. I decided I liked the larger better so I hope to knit the largest size for myself when time allows. I think Amanda is planning on doing the same and that we are both looking at more spring-like colors.

The fine gauge of 25 sts and 35 rows per 4″ of stockinette stitch combined with the hollow fibers of alpaca and the hat is nearly weightless and a great hat for transitioning into spring! It also does not create hat head! I highly recommend knitting it in an alpaca silk blend or at least a camelid (camel, llama and vicuñas) and engineered fiber (rayon, tencel, bamboo, soy, seacell etc.) blend yarn. If that is out of your reach (or stash) a wool blend will work. I recommend one that contains at least 30% silk or engineered fiber and is not plied hard (yarns that are plied hard don’t really compress and are kind of sproingy along their length, because they don’t compress the short rows would be highly pronounced and the fabric would likely not have the drape intended for this design). Because the hat is knit from side to side row gauge is of the utmost importance for proper fit. Please do not skip swatching, and for the best outcome wash and dry the swatch as you intend to handle the finished hat.

Sur la Tête - Flat

Both Amanda and I chose to make coordinating pearl buttons for our hats from Swarovski Elements Crystal Pearls and headpins. I’ve included written instructions in the PDF on how to do the same and I hope to have a photo tutorial up here at the blog in the next week or so. But you can certainly use 6-8mm vintage or contemporary commercial buttons as well. If you wish to make your own I highly recommend FusionBeads.com as you get free shipping no matter the size of the order so you can order just 1 of several different colors and even sizes or types of beads to get a good match and then place your full order.

Sur la Tête - Modeled

What is really exciting about this release is that my designer page at Ravelry is now open to the public - no Ravelry membership required to view or buy my patterns! So just visit the Sur la Tête pattern page. All monetary transactions take place through PayPal, Ravelry is just the delivery vehicle for the 4-page PDF file and does not have access to your credit card or banking information.

So what color and yarn are you going to knit yours in?

« Previous PageNext Page »