Fiber Fool

Follow the feats and foibles of a fiber fanatic.

My Heart Aches for Oklahoma

Filed under: Knitting, Knitting Patterns, Woes — Kristi at 8:01 am on Tuesday, May 21, 2013

A little afternoon knitting on the patio with my bud Brandon, some tea, and _Changeless_.

While living through one natural disaster is never the same as another, I know some things are universal whether you survived a devastating flood that covered more than 3/4 of a town like I did, a hurricane or a tornado like that the hit Moore, OK yesterday:

  • It is upsetting to not know how friends and loved ones are faring
  • It is stressful not knowing where your next meal is going to come from
  • Or where you are going to sleep and when you might get sleep again
  • While help may be coming it never seems like quite enough or fast enough or last long enough to find some sort of new normalcy

Towel Trio Stellar Facecloths

I am not in a position right now to make the kind of difference I’d like, but every little bit helps. Especially a lot of little bits. I’ve experienced it. And while it won’t be super timely, I know the citizens of Moore will need help for a while. I’d like you to help me help the tornado victims. I’ll be donating 10% of my Ravelry pattern profits through June 20th to the American Red Cross Oklahoma Tornado Relief Fund.

Simple Shrug Needing Name

I’ve you’ve been procrastinating on buying Nourishing Knits now would be a great time! I also have a lot of really great patterns for summer knitting, some as economic as $3 - Towel Trio, Stellar Facecloth, Cirrus Shrug, Ganache Shawl, Kate Shawl and of course tons of sock patterns.

Kate Shawl

On a personal note, I’m slowly finding my new normal while DH is gone and things are improving now that I have some part time work, my hands are out in the garden, and I’m back to the gym thanks to Christmas and birthday money from my parents and grandparents. Thank you to those who took the time to send me e-mail or Rav mail. I really appreciate it and will get back to you soon. I’ll update you all on what I’ve been up to over the coming days and weeks I’m sure.

Slipper KAL: Vamp Set-Up

Filed under: Knitting, Knitting Patterns, Slipper KAL — Kristi at 5:13 pm on Monday, February 13, 2012

Ready to Set Up the Vamp of Pemberley

Now that we figured out how to determine the body of the slipper length before beginning the vamp, it is time to set up for the vamp and toe. We are sooo close to a finished slipper!

One trick that didn’t make it into the patterns is to not bother with waste yarn or stitch holders to set aside the body stitches of the slipper. Instead, I just leave those stitches on the circular needle I was working on and then work the edging extensions - be it the aspen leaf lace for Pemberley or the ribbing for Masala on DPNs. Once you’ve knit the extension of the edging as directed in the pattern you’ll move those body stitches to DPNs.

Pemberley Transfer Held Sts to 2 DPNs

For Pemberley, where the two DPNs meet will become the start of round once the set-up is complete. For Masala, we don’t want to mess up the fair isle stitch pattern so the start of round for that will occur at a corner of the vamp instead. Unfortunately ones body only endures so much knitting in a day and I am not up to the vamp set up on my Masala so I can’t show you the step-by-step on that one at this point. But the general process is very similar so hopefully seeing it on Pemberley will still prove useful for you Masala knitters.

Pick Up Stitches Along the Extended Edging

Once you get to the top of the foot area you’ll pick up and knit stitches along the edging extension. The method of picking up and knitting the stitches will be the same as for along the heel flap. With Pemberley though you will not have two stockinette stitches next to each other. You’ll have 1 stockinette selvedge stitch next to garter stitch. But you’ll still be picking up and working the bar between the first two stitches.

For Masala you’ll pick up one stitch per row in the extension along the edge that has two stockinette stitches next to each other. With the narrowness of this edging be extra careful to make sure you aren’t twisting the edging. If you do twist it, don’t sweat it. Just pull out all the stitches you picked up and give it another go. It is just knitting and can be redone. Just tug on the edging a bit to reseat the stitches before giving it another go. If it looks like you may have a gap, go ahead and pick up 1 extra stitch at each corner and decrease them away in the next round. I’d probably work the extra stitches in the CC and decrease it with the CC line at the corners.

For Pemberley the rate of picking up stitches will vary depending upon the size you are working. The easiest way to evenly distribute the stitches is to mark the half way point of the edging extension and pick up half the stitches on each half. Like Masala, if needed go ahead and pick up an extra stitch at the corners and decrease them away on the next round.

Pemberley Vamp Stitches All Picked Up

Like at the heel flap, look at your knitting as you pick up and work the stitches and to make sure you are picking up in a straight line. Above is what it looks like once all the stitches have been picked up along the edging extension. You’ll note the stitches are on only 3 DPNs. You’ll work some more stitches to redistribute them evenly on 4 DPNs. For Pemberley you’ll also get situated to the new start of round at the center of the sole.

Pemberley At End of Vamp Set-Up

Here is a look at the start of round immediately following the vamp set up.

The rest of the slipper is now easy. You knit in the round until the vamp measures the length in the pattern or the length you calculated when customizing the slipper length. Then you work the toe.

Pemberley WIth ~3/4" Vamp

This is Pemberley with about 3/4″ of vamp worked so far. There are just a few more rounds to go before starting the toe shaping.

The toe shaping for Pemberley is much like the crown of a hat. Simply follow the instructions in the pattern.

Masala Slippers

The toe shaping for Masala is just like a wedge toe, but it has been rotated so the “wedge” is on the top and bottom of the toes instead of along the sides of the toes. The width of the wedge has also been extended to contain 1 full repeat plus 1 stitch. To maximize size customization the toe is not charted out separately. By this point you should have a good feeling for the pattern, so the instructions tell you to decrease in pattern with detail given for the placement and color to work the decreases to keep the strong, bold pattern of the toe.

If you look at the toes in the above photo you’ll note how the two central lines in CC get a bit bolder at the toe. That is because the decreases are taking place along those lines which makes them more prominent.

In the next KAL post I’ll answer a few questions that have come in and discuss a few options for modifications/customizations. If you have questions, please ask them in the comments or over in the Ravelry thread.

Slipper KAL: Customizing the Length

Filed under: Knitting, Knitting Patterns, Slipper KAL — Kristi at 1:45 pm on Thursday, February 9, 2012

Masala Slipper Diagram

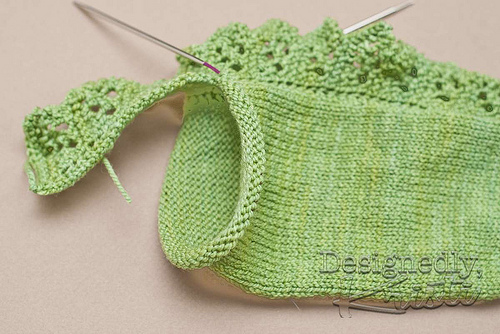
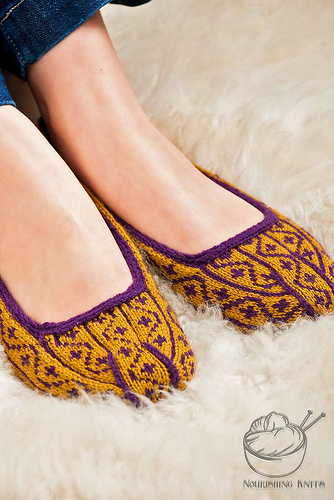
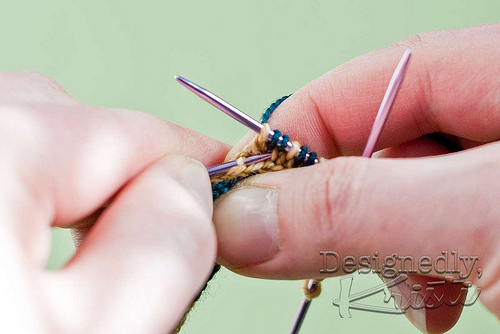
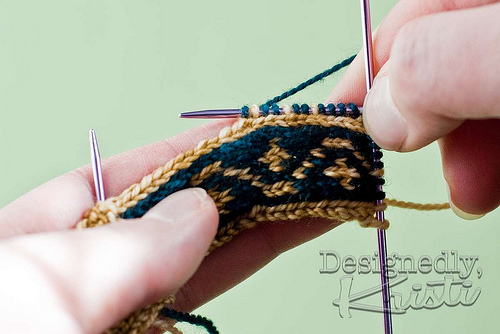
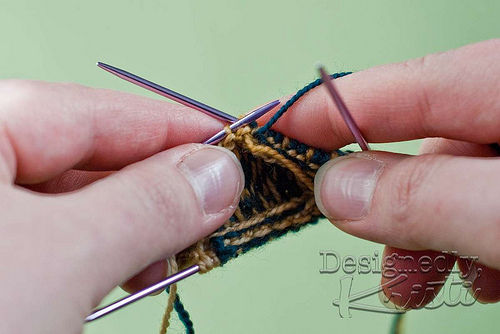
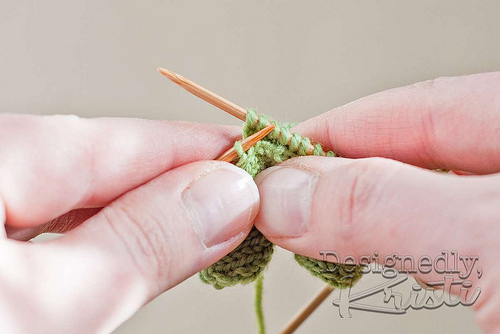
Both the Pemberley and Masala slippers can be customized in length to fit your foot. Masala is easiest to adjust whereas Pemberley is somewhat constrained due to the repeats of the lace. In order to customize the slippers though we need to understand what the vamp is.

From dictionary.com:

vamp
noun
1. the portion of a shoe or boot upper that covers the instep and toes.

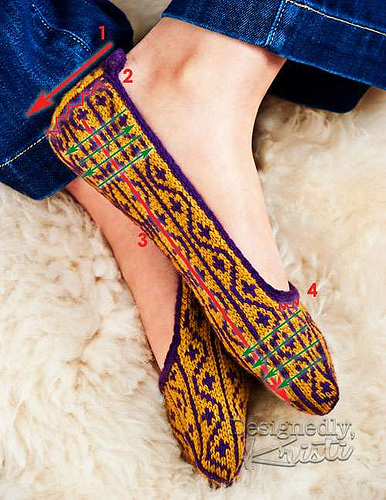
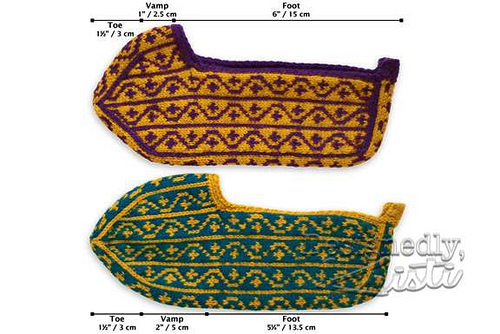
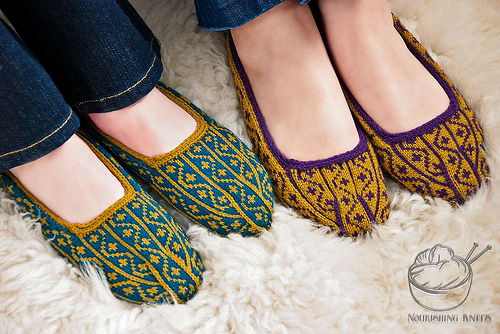
In this case, I apply the term vamp to the portion of the slippers that is worked in the round without any shaping. The two pairs of Masala in Nourishing Knits have two different vamp lengths - 1″ (purple and gold) and 2″ (teal and gold). The vamp length impacts the look of the slipper as well as the fit.

Masala Slippers

The longer the vamp, the more secure the slipper is on the foot and the more casual the look. A deeper vamp can make it more effort to get the slipper on, so make sure the slipper length before starting the vamp is at least as long as the measurement from the back of the heel to the front of the arch. For most, a vamp depth of 1-2″ is recommended. Less than that and the slipper is likely to fall off the foot.

So once you’ve decided on your desired vamp length, you need to figure out how long the toe section will be at your row gauge as well as the desired total length of the slipper to know when to begin the vamp. Since it can be very difficult to match row gauge it is important that you check your row gauge now. If you don’t already know the total length of your foot, take that measurement too.

Slipper Length

For a nice snug fit, you want the slippers to be about 10% shorter than your foot length. To calculate that, just multiply your foot length buy 0.9.

SLIPPER LENGTH = FOOT LENGTH X 0.9

Toe Length

Figure out how many rounds will be worked in shaping the toe. I did that for you already in the sidebar in the Masala pattern - 15 rounds. For Pemberley, I give you the toe length in inches if your row/round gauge match that given in the pattern (11 rnds per inch). If your gauge doesn’t match, you’ll need to read the pattern to figure out how many rounds are worked in the toe shaping.

Shape toe: Dec rnd: *K2tog, knit to last 2 sts of needle, ssk; rep from * 3 more times — 8 sts dec’d. Rep dec rnd every other round 5 (6,7) more times — 8 sts rem.

That means you have 1 (1, 1) rnd, plus 5 (6, 7) decrease rounds, plus 5 (6, 7) rounds worked evenly in between the decrease rounds for a total of 11 (13, 15) rnds in the toe.

The toe length in inches will be the number of rounds in the toe divided by your round gauge.

TOE LENGTH = TOE RNDS / RND GAUGE

Foot Length

Now that we know the total slipper length, the desired vamp length and the toe length we can figure out how long the foot of the slipper should be before we join for working in the round. Simply take the total slipper length and subtract the vamp length and the toe length.

FOOT LENGTH = TOTAL SLIPPER LENGTH - VAMP DEPTH - TOE LENGTH

For Pemberley Only

Due to the lace edging and needing to end a repeat at the same point you have some constraint on the foot length which means a little more math and possibly changing the vamp depth to maintain your total slipper length. The first step is to figure out how much foot length a repeat of lace edging adds. Again you’ll need to your row/round gauge. You’ll take the number of rows in a pattern repeat (8) and divide by the row gauge.

PATTERN REPEAT LENGTH = 8 ROWS PER PATTERN REPEAT / ROW GAUGE

For the total number of pattern repeats to work, simply divide the foot length by the pattern repeat length.

# PATTERN REPEATS = FOOT LENGTH / PATTERN REPEAT LENGTH

Chances are you got a crazy number as your answer. If you opted for a vamp depth of less than 2″, round down to the nearest whole number. If you were aiming for a 2″ vamp it is probably safest to round up.

With this rounding of numbers your actual vamp length may need to be adjusted. So, figure out what the new foot length will be first by multiplying the number of pattern repeats by the pattern repeat length.

NEW FOOT LENGTH = # PATTERN REPEATS X PATTERN REPEAT LENGTH

Using this new foot length and the toe length we can determine the actual final vamp depth you’ll need to work before shaping the toe. Simply subtract the new foot length and the toe length from the total slipper length.

ACTUAL VAMP DEPTH = TOTAL SLIPPER LENGTH - NEW FOOT LENGTH - TOE LENGTH

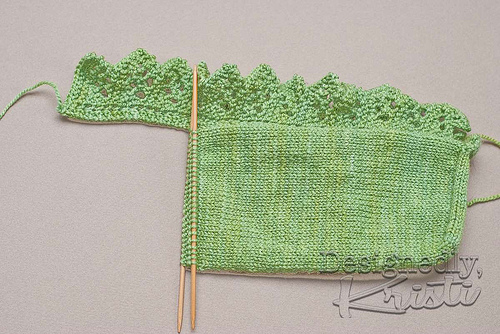
When working Pemberley do stop at the same point in the final pattern repeat as is instructed in the pattern - after a row 7. You’ll set up the extension of the lace edging that will run across the top of your foot on the final row 8 of your last pattern repeat.

As usual, please feel free to leave any questions in the comments. Go ahead and finish your slipper foot section and the extended edging. The next KAL post will be the set up for working in the round.

Slipper KAL: Set-Up for Main Body (or Picking Up Heel Flap Stitches)

Filed under: Knitting, Knitting Patterns, Slipper KAL — Kristi at 8:21 pm on Monday, February 6, 2012

Your Mission, if you choose to accept it is to end up with a small rectangle of yarn with sitches on three DPNs on three of it’s sides. It should look like:

Ready to Knit Sides/Sole of Slipper Masala

Or this:

Pemberly Slipper Ready for Side/Sole

As I mentioned in the previous post, picking up and working the stitches on this heel flap is different than on a sock. However, if you are experienced in picking up stitches for say a buttonband or similar thing where you pick up stitches along a vertical edge that does not have slipped stitches as the selvedge you already have the skills you need.

You will essentially pick up the bar in between the selvedge stitch and the next inside stitch and working that. This graphic (scroll down to “vertical edge”) and this graphic might make that a bit clearer. Oddly, most of the videos on YouTube were either not for vertical edges or used slipped stitch edges. This one uses the method I recommend for these patterns, but it is a tad out of focus, but you may find it helpful anyway.

Masala

Pick Up Bar Between First & Second Stitch of Heel Flap

Here I have the bar on the left needle tip. You can see that if it were a stitch it is mounted wrong with the “right leg” at the back of the needle so I knit it through the back loop. If you pick up the bar from right to left with the left needle you do not need to work it through the back loop. Now, for Masala, because it is stranded and stranded stitch gauge and row gauge is often really close to 1:1 you will pick up and knit one stitch for each row in the heel flap. The last three stitches you pick up will come from those three garter stitch rows that started out the heel flap after the tab and will be worked in only the CC. These three are the self-finishing edging.

Check Your Progress

Now, as you progress look at your knitting and make sure you have a nice straight line. A one stitch stripe of CC below the right hand needle. This means you are picking up and knitting in the right spot. Doing so really makes the slipper look seamless. Now if you look and something isn’t right, just drop of any stitches up to the bad one(s) and drop those off the needle as well. Then tug the heel flap a little in both directions to redistribute the stitches and give it another go. Don’t stress about it.

Once you’ve picked up the stitches along that side as directed, you’ll turn your work and purl back as the pattern tells you. Then you get to pick up stitches along the other side of the heel flap. Though since the WS is facing you, when you pick up that bar you’ll purl it instead of knit it.

Pick Up and Purl on WS of Heel Flap

I still pick up the bar between the edge stitch and the next one from the RS of the heel flap. I just kind of tilt it towards me so I can see where I need to grab the bar. Then I purl the bar (or purl it through the back loop if it isn’t seated correctly). Just like on the other side of the heel flap you’ll pick up and purl 1 stitch for each row of the heel flap, with the last three stitches being in CC only.

That is it! It is that simple. Now you’ll just keep working in pattern. As stated in the pattern, be certain you are carrying the two colors of yarn consistently. I like to carry the “design color” (CC) below the background color (MC) as the CC stitches are then a tiny bit larger and stand out from the background a bit like bold text. When purling I actually drop the yarns and pick up the one I need. I drop the MC kind over the top of the right needle and let the CC yarn just drop down. When knitting I carry the MC in my right hand and the CC in my left.

Oh, and the yarn I settled on? I’m going with Miss Babs “Yummy” Sock 2-Ply Fingering in Cadet and Bronze!

Pemberley

Pick Up Bar Between The Selvedge Stitch and the Next Stitch of Heel Flap

Just like Masala, you will be picking up the bar between the first/last 2 stitches at the edges of the heel flap. With the left DPN, pick up the bar.

Once Picked Up - Knit It

If you picked up from left to right, knit the bar through the back loop. If you go from right to left with the left needle, just knit the stitch normally.

Now, because we are dealing with plain stockinette stitch with Pemberley, you’ll note that the pattern had you work more rows than the number of stitches you pick up and knit. Basically, you’ll want to pick up roughly 3 out of every 4 rows. Any extra stitches should be put at the ends of the heel flap.

Place Marker and CO for Edging As Directed

Because the self-finishing edging on Pemberley is lace that will fold over you will cast on the stitches for the edging rather than pick them up like Masala. The pattern calls for using the backwards loop method. Often I’d be a fan of substituting a cable or knitted cast on, but that ends up being a bit too substatial in appearance for the edging so I do recommend you stick to the pattern and use the backwards loop.

Place Marker and CO for Edging As Directed

If you are planning on a contrasting lace edging, you’ll want to cast on these stitches with the contrasting yarn. You’ll need to do so on the other side too, so you’ll need two sources of the contrasting yarn. Because it is intarsia and you’ll need to twist the two yarn sources each time you switch between the yarns I don’t recommend using both ends of one ball of yarn. Either make yarn butterflies, use spools or make two smaller balls of yarn.

Pick Up and Purl Stitches

Once all the stitches are cast on for the edging you’ll turn your work and purl back as directed. Then pick up and purl stitches along the other side of the heel flap. Tip the heel flap so you can see the first two stitches of the edge and pick up the bar. Again, if you pick the bar up such that isn’t mounted like a normal stitch, purl it through the back loop. Otherwise, purl it normally. Pick up and purl at the same rate as you did on the other side - roughly 3 stitches for every 4 rows of heel flap. Then again place a marker and cast on the edging stitches - using the second ball of contrasting color if you are doing a contrast edging.

There you go! That is all there is to it. Now you just keep working flat in stockinette stitch across all three DPNs, working with a fourth one.

Next post I’ll cover a bit about length sizing and the vamp (including a definition, though those of you with Masala there is a sidebar that goes into that). But you should be good to keep knitting for a fair bit, so go ahead and keep knitting. To be safe, you probably want to stop by the time you get to the forward part of your arch in case you need to make any adjustments.

Slipper KAL: Construction Overview & Heel Flap

Filed under: Knitting, Knitting Patterns, Slipper KAL — Kristi at 6:06 pm on Sunday, February 5, 2012

Annotated Masala Construction

I think one of the biggest stumbling blocks in knitting either the Masala or Pemberley slippers is to let go and trust the pattern. The slippers definitely look like socks and parts of their anatomy are the same as socks. Even some of construction is like socks. But they aren’t socks so there are some definite things that are done differently when knitting these slippers.

Because of the lines of the colorwork on Masala I think it is easier to see the construction on those, but Pemberley is worked in the same fashion. Instead of 3 stitches of ribbing at the edges around the foot you have the lace edging. There are differences in numbers due to the differences in gauges, but the basic construction is identical.

Construction is started at the heel tab. If you’ve ever done a picot or a hemmed edge, that is how the heel tab is formed. It is just worked over a small number of stitches. If you are not familiar with this technique check out this video on YouTube which gives a good overview. It is lacking the turning row that I like to use for a nice crisp “crease” but the basics are the same.

Once the heel tab has been completed you continue working a narrow heel flap (1 in the photo above). It is worked flat, knitting back and forth in stockinette stitch. Unlike sock heel flaps, do not slip the first stitch of each row. Stitches will be picked up a little differently. Because the heel flap here is so narrow there is no need to “turn the heel” like you would in a sock with a heel flap. This heel flap is already the width of the live stitches at the end of a turned heel flap heel. So the cup of the heel is just formed by picking up and knitting stitches along both edges of the heel flap (2 in the photo above). If you look at the bottom of Masala in the photo below, the strip between the two red arrows are the original heel flap stitches worked the entire length of the slipper!

More Masala Construction Annotation

Now one of the other tricky bits is this picking up of heel stitches. I’ll go into it in more detail in the next post. But because we are turning such tight corners around that narrow heel flap it works best to use a DPN for each of the sides even though ultimately you will continue to work the knitting flat (indicated by the green arrows alternating directions) and not in the round. A circular needle just can’t make those tight corners. Once you have 1.5-2″ of fabric after the heel flap you can switch to a circular and I recommend doing so. The knitting goes a bit faster and you don’t have to worry about ladders where the needles meet. You’ll continue working the sides/sole of the slippers flat (3 in the top photo) until you get to the ball of the foot or so. The exact length will depend upon your total foot length as well as the vamp depth you desire.

To keep finishing to a minimum, you’ll pause work on the main part of the slipper and extend the edging (ribbing in the case of Masala and lace in the case of Pemberley) on one side of the slipper for the length required to go across the top of the foot and connect the two sides. Then stitches are again picked up along that edging and then knitting in the round begins. You’ll work in the round evenly for a bit and then you’ll start decreasing for form the toe and you are done except to weave in ends! That’s it!

Next post I’ll show you how to pick up and knit the stitches along the heel flap. As I mentioned above we’ll be doing so a little differently than on socks. Any questions so far?

Next Page »