Slipper KAL: Set-Up for Main Body (or Picking Up Heel Flap Stitches)
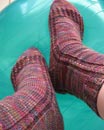
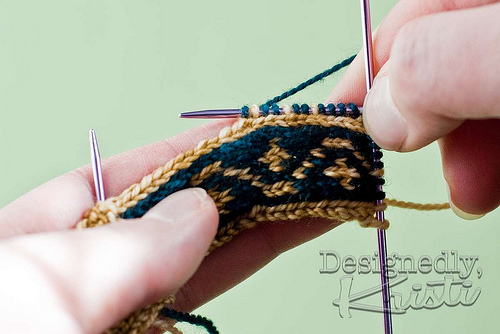
Your Mission, if you choose to accept it is to end up with a small rectangle of yarn with sitches on three DPNs on three of it’s sides. It should look like:
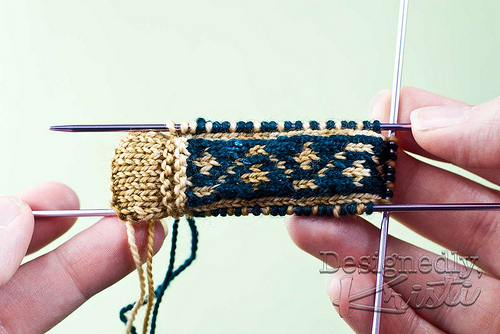 Masala
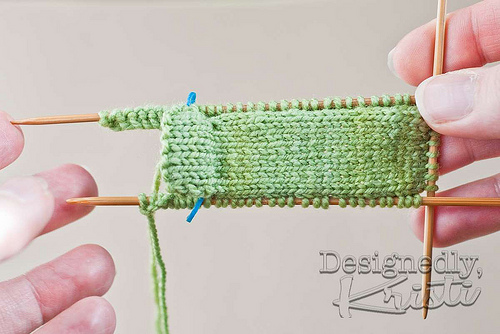
Or this:
As I mentioned in the previous post, picking up and working the stitches on this heel flap is different than on a sock. However, if you are experienced in picking up stitches for say a buttonband or similar thing where you pick up stitches along a vertical edge that does not have slipped stitches as the selvedge you already have the skills you need.
You will essentially pick up the bar in between the selvedge stitch and the next inside stitch and working that. This graphic (scroll down to “vertical edge”) and this graphic might make that a bit clearer. Oddly, most of the videos on YouTube were either not for vertical edges or used slipped stitch edges. This one uses the method I recommend for these patterns, but it is a tad out of focus, but you may find it helpful anyway.
Masala
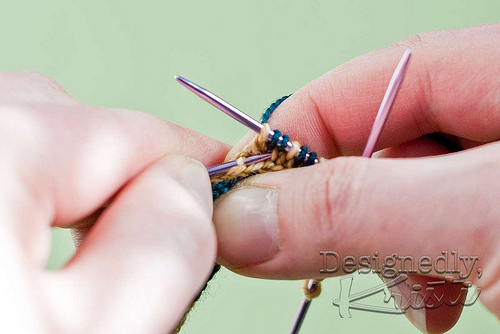
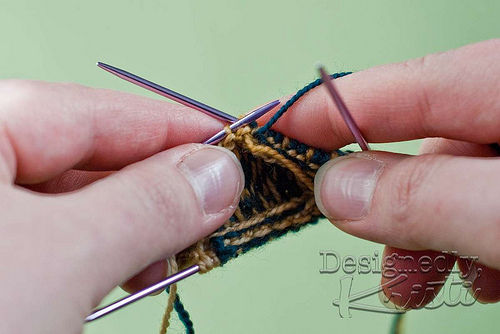
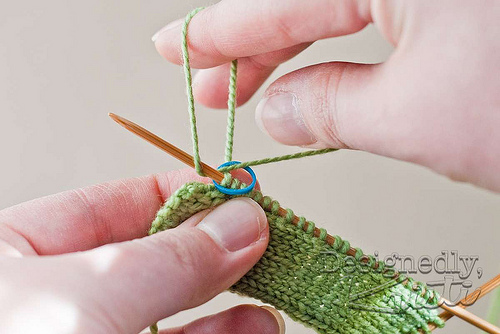
Here I have the bar on the left needle tip. You can see that if it were a stitch it is mounted wrong with the “right leg” at the back of the needle so I knit it through the back loop. If you pick up the bar from right to left with the left needle you do not need to work it through the back loop. Now, for Masala, because it is stranded and stranded stitch gauge and row gauge is often really close to 1:1 you will pick up and knit one stitch for each row in the heel flap. The last three stitches you pick up will come from those three garter stitch rows that started out the heel flap after the tab and will be worked in only the CC. These three are the self-finishing edging.
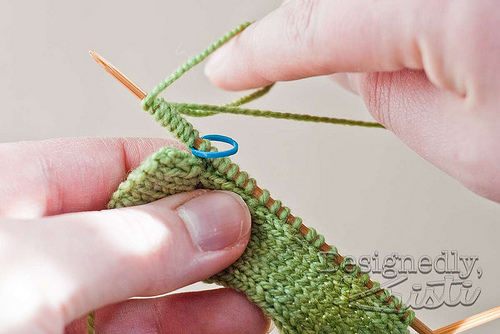
Now, as you progress look at your knitting and make sure you have a nice straight line. A one stitch stripe of CC below the right hand needle. This means you are picking up and knitting in the right spot. Doing so really makes the slipper look seamless. Now if you look and something isn’t right, just drop of any stitches up to the bad one(s) and drop those off the needle as well. Then tug the heel flap a little in both directions to redistribute the stitches and give it another go. Don’t stress about it.
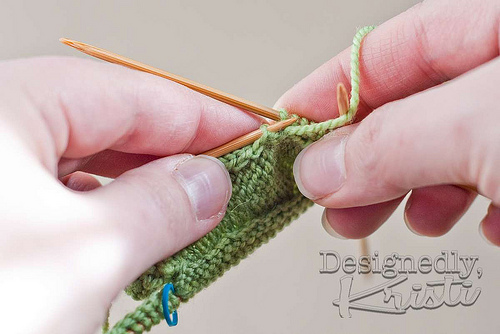
Once you’ve picked up the stitches along that side as directed, you’ll turn your work and purl back as the pattern tells you. Then you get to pick up stitches along the other side of the heel flap. Though since the WS is facing you, when you pick up that bar you’ll purl it instead of knit it.
I still pick up the bar between the edge stitch and the next one from the RS of the heel flap. I just kind of tilt it towards me so I can see where I need to grab the bar. Then I purl the bar (or purl it through the back loop if it isn’t seated correctly). Just like on the other side of the heel flap you’ll pick up and purl 1 stitch for each row of the heel flap, with the last three stitches being in CC only.
That is it! It is that simple. Now you’ll just keep working in pattern. As stated in the pattern, be certain you are carrying the two colors of yarn consistently. I like to carry the “design color” (CC) below the background color (MC) as the CC stitches are then a tiny bit larger and stand out from the background a bit like bold text. When purling I actually drop the yarns and pick up the one I need. I drop the MC kind over the top of the right needle and let the CC yarn just drop down. When knitting I carry the MC in my right hand and the CC in my left.
Oh, and the yarn I settled on? I’m going with Miss Babs “Yummy” Sock 2-Ply Fingering in Cadet and Bronze!
Pemberley
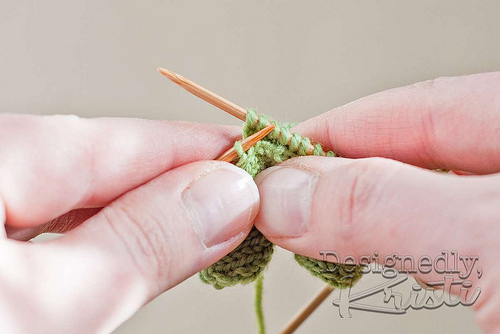
Just like Masala, you will be picking up the bar between the first/last 2 stitches at the edges of the heel flap. With the left DPN, pick up the bar.
If you picked up from left to right, knit the bar through the back loop. If you go from right to left with the left needle, just knit the stitch normally.
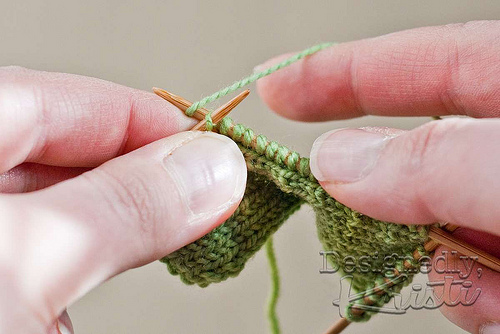
Now, because we are dealing with plain stockinette stitch with Pemberley, you’ll note that the pattern had you work more rows than the number of stitches you pick up and knit. Basically, you’ll want to pick up roughly 3 out of every 4 rows. Any extra stitches should be put at the ends of the heel flap.
Because the self-finishing edging on Pemberley is lace that will fold over you will cast on the stitches for the edging rather than pick them up like Masala. The pattern calls for using the backwards loop method. Often I’d be a fan of substituting a cable or knitted cast on, but that ends up being a bit too substatial in appearance for the edging so I do recommend you stick to the pattern and use the backwards loop.
If you are planning on a contrasting lace edging, you’ll want to cast on these stitches with the contrasting yarn. You’ll need to do so on the other side too, so you’ll need two sources of the contrasting yarn. Because it is intarsia and you’ll need to twist the two yarn sources each time you switch between the yarns I don’t recommend using both ends of one ball of yarn. Either make yarn butterflies, use spools or make two smaller balls of yarn.
Once all the stitches are cast on for the edging you’ll turn your work and purl back as directed. Then pick up and purl stitches along the other side of the heel flap. Tip the heel flap so you can see the first two stitches of the edge and pick up the bar. Again, if you pick the bar up such that isn’t mounted like a normal stitch, purl it through the back loop. Otherwise, purl it normally. Pick up and purl at the same rate as you did on the other side - roughly 3 stitches for every 4 rows of heel flap. Then again place a marker and cast on the edging stitches - using the second ball of contrasting color if you are doing a contrast edging.
There you go! That is all there is to it. Now you just keep working flat in stockinette stitch across all three DPNs, working with a fourth one.
Next post I’ll cover a bit about length sizing and the vamp (including a definition, though those of you with Masala there is a sidebar that goes into that). But you should be good to keep knitting for a fair bit, so go ahead and keep knitting. To be safe, you probably want to stop by the time you get to the forward part of your arch in case you need to make any adjustments.