Fiber Fool

Follow the feats and foibles of a fiber fanatic.

Diversions…

Filed under: Knitting, Spinning, Dyeing — Kristi at 8:32 am on Wednesday, August 15, 2007

A Work in Progress from Handspun

I must confess, the socks are currently in time out. You need to be in a certain mood or frame of mind to handle ripping back on socks knit on US0s I think. At least if you didn’t have the foresight to put in a lifeline before trying a new-to-you heel technique. With the heat I just was not there yesterday. So, I diverted myself with the project I cast-on at SnB on Monday night. I ripped it out and started it two more times since then. There have also been points where I have ripped back about 12 rows on this. But, that is part of designing on the fly so I was okay with that. Plus, it is on US2 and wool so ripping back and picking back up isn’t nearly as daunting.

Two Handspun Yarn Cakes

Handspun in a Yarn Cake
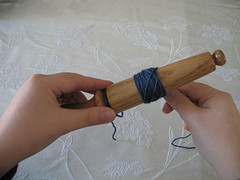
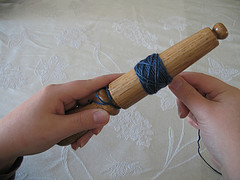
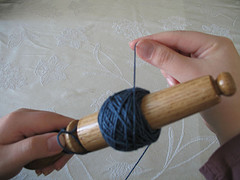
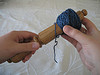
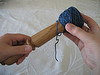
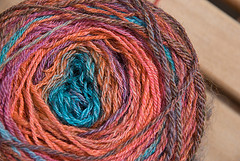
When I spun this yarn I did an experiment. One of the yarn cakes had the singles spun just from the pre-drafted roving. The other cake was spun from the roving (in the same direction) split in two and then pre-drafted. Both were Navajo plied with subtle color changes. Do you see the difference in the cakes? I *love* when you can see the color shifts in the balls like this.

Part of a Work in Progress in Handspun
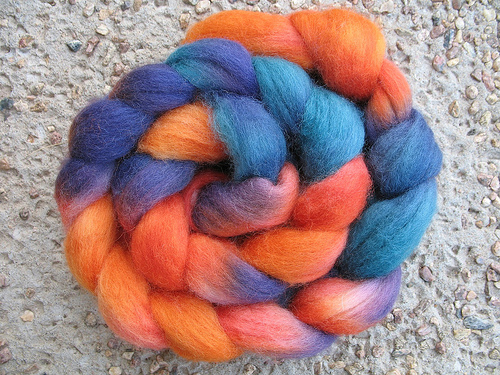
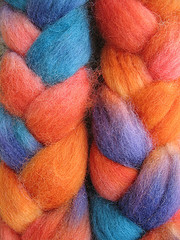
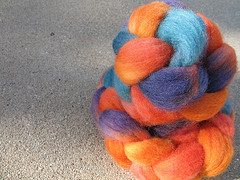
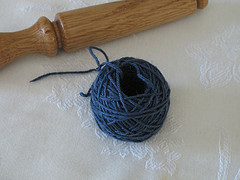
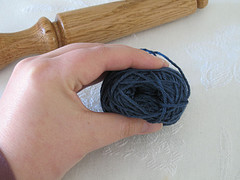
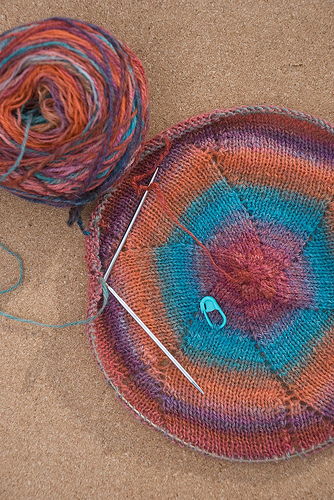
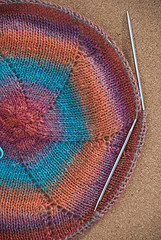
I am also really loving the circular knitting with this ombre striping yarn. Of course it helps that it is my own hand dyed and spun yarn :-) For the observant, yes, that is the remainder of the roving which was used in the Spin-Off Spring 07 photoshoot for the Queen of Diamond socks. This part of the roving is much brighter than the part that I used to spin and knit QoD. The random 2-ply of the QoD yarn muted the colors some, whereas the Navajo Plying let them stay fairly true and unmixed.

It is rather interesting to knit with this yarn. It is the same fiber, same dyeing method, all dyed at the same time. But, this yarn is definitely better than what I used for QoD. What a difference 6 months can make in one’s spinning skills! This yarn has more spring, it is thinner (despite being 3-ply rather than 2-ply), and is fairly consistent. I do see how Navajo plying can highlight inconsistencies though. Where I am inconsistent, I’m really inconsistent! Those of you out there who spin - knit with your hand spun on at least a semi-regular basis. It can help guide you in building your spinning skills and repertoire as well as help you decide what types of hand spun you prefer to knit with - woolen, worsted, 2-ply, 3-ply, cabled etc. It has made a big difference for my skills.

It isn’t all gardening around here…

Filed under: Spinning, Dyeing, Finished Objects — Kristi at 6:24 am on Thursday, June 14, 2007

Solar Dyed Punta Top

This past weekend I whipped up a couple pots of fiber to solar dye. It works well with the gardening as it doesn’t need much attention beyond the initial application of the dye. Also, at our altitude it doesn’t need much help either. Both rovings were just dyed in enameled pots - a canner and a roaster. I did use acid dyes this time - Jacquard.

Solar Dyed Punta Top Solar Dyed Punta Top

This bright one was dyed in the roaster. I drained the soaked and mordanted fiber and zig-zagged it across the bottom of the roasted the short way. Then I dyed the four colors in stripes the long way across the roaster. This produced a palindrome striping effect. When I get up to working with this top I plan to try the striping techniques described in the cover article of the Summer Spin-Off. The top is Punta wool top that I got in July 2005 at Detta’s Spindle in Minnesota. It was really nice to work with as far the dyeing goes and I’m anxious to see how it spins up.

So, I know looking at this it doesn’t look very solar dyed. Well, that is because I’ve done some post processing to it :-) On the last trip to Brown Sheep I got a bit bag of seconds wool. It was literally scooped off of the machines and was in sorry to shape to spin from as is. I got a really good deal on it. And the fiber itself was still just fine, just not in the nice top form. So, I rainbow dyed 1 lb of it with many of the same cool dyes as the above, but in lesser concentrations. It looked hideous out of the pot. However, last week Cathy kindly sent me home with her drum carder (and a bunch of peonies from her garden which still look fantastic) so the past couple of days I’ve snuck in some time here and there to play with the solar dyed wool seconds and the drum carder. This is a mix of chartreuse, violet, and teal. I also added in about 20% natural soy silk. The batts feel heavenly with that in there. I can already feel a change in “drape” just in the carded form! It is three batts adding up to 4.7 oz.

Spinning BattI still have 3/4 of a pound of the seconds to play with. I think I’ll be carding it in with some different wool or I might dye up some more of the seconds in higher concentrations. It will be a while though as I’ve found the carding to be a bit rough on my back/shoulders/neck. I’ll have to take it in small doses. But I think the three batts are pretty consistent in the overall color impression which as me excited. I have no immediate plans for it. But it sure feels nice to hug and pet :-)

For whatever reason I’m lacking the capacity to name things. Neither of these fibers has names. Nor does the anklet that was seen fraternizing with the basil. I’m open to suggestions if you have them!

A Spinning Meme…

Filed under: Moi, Spinning, Dyeing, Lemming — Kristi at 8:19 am on Wednesday, May 16, 2007

I found it very beneficial to go through the list for the knitting meme yesterday and see what I have done, what I haven’t done and what I had maybe forgotten that I wanted to try. A lot of my knitting is focused on socks so it makes sense that my spinning is focused on getting to my preferred sock knitting weight, but there are so many other areas of spinning to explore. I decided a meme on spinning would be beneficial to look at as well.

The directions are the same as those book memes and the more recent knitting one. Bold those things you have done, italicize those you wish to do, and leave plain the ones that are of no interest to you.

FIBERS SPUN

Fine Wools (i.e. Merino, Cormo, Rambouillet, Polwarth, CVM, etc)
Longwool & Crossbreed Wools (i.e. BFL, Cotswold, Lincoln, Romney, Coopworth, Teeswater, etc.)

Down-type Wool (i.e. Black Welsh Mountain, Dorset, Cheviot, Shetland, etc.)
Double Coated Wool (i.e. Icelandic, Navajo-Churro, Karakul, etc.)
Mohair
Cashmere
Angora

Alpaca
Llama
Camel

Vicuna
Bison/Buffalo
Yak
Quiviut

Dog
Cat
Silk Caps/Bells/Hankies
Silk Sliver
Linen
Hemp
Cotton (prepared)
Cotton from the Boll

Engineered Fibers (Rayon, Bamboo, Soysilk, Ingeo, Ecopoly, etc.)
Recycled Fibers (Sari Silk, Jeans, Garnetted, etc.)
Holographic Fibers (Angelina, etc.)
Commercially Combed Top
Commercially Carded Roving
Hand Combed Top
Hand Carded Rollags
Hand Drum Carded Batts

FIBER TOOLS USED

Flicker
Hand Cards

Mini-Combs
English Combs
Hackle
Diz
Distaff
Drum Carder
Nostepinne
Niddy Noddy

Yarn Meter
Skeiner
WPI Tool
McMorran Balance
Top Whorl Spindle
Mid-Whorl Spindle
Bottom Whorl Spindle (includes Turkish)

Supported Spindle (Navajo, Tahkli, etc.)
Castle Wheel

Saxony Wheel
Great Wheel
Portable Wheel (Little Gem, Joy, Lendrum, Hitchiker, etc.)
Electric Spinner
Charka

Tensioned Lazy Kate

SPINNING TECHNIQUES & YARN TYPES SPUN

Worsted Spun
Woolen Spun
Long Draw
Short-Forward Draw
Double Drafting
Singles

Energized Singles
Andean Plied 2-Ply (Wheel or Spindle?)
Center-Pull Ball 2-Ply (Wheel or Spindle?)
2-Ply from Bobbins/Cops
3-Ply from Bobbins/Cops
Navajo Ply 3-Ply (Chained Singles)

4+ Ply from Bobbins/Cops
Bulky/Super Bulky Weight
Worsted Weight
DK Weight
Sport Weight
Fingering Weight

Lace Weight
Cabled Yarns
Fulled Yarns

Slub Yarn
Marled Yarn (Barber-Poled Colors)

Seed Yarn (1 Thick and Soft Ply, 1 Firm and Thin)
Wrapped Spiral Yarn
Flame Yarn (Like Seed Yarn, but with Slubs)
Turkish Knot Yarn
Boucle Yarn
Beaded Yarn

Coiled Yarn
Encased Yarn (Fabric, Flower, Feather, etc. Captured Between Plies)

OTHER RELATED ACTIVITIES

Buy a Fleece
Wash a Fleece

Blend Fiber Types (Combed or Carded)
Blend Colors (Combed or Carded)

Dye Handspun Yarn
Dye Prepared Roving/Top
Dye Locks
Solar-Dye Fiber
Kool-Aid/Food Coloring Dye Fiber
Natural Dye Fiber
Commercial Dye Fiber (Gaywool, Jacquard, etc.)

Attend a Wool Festival
Take a Spinning Class
Take a Dyeing Class
Spin in Public
Teach Children to Spin
Teach Adults to Spin

Knit with Your Handspun
Crochet with Your Handspun
Weave with Your Handspun
Design a Project to Match Your Handspun
Design a Project from Fiber to FO
Spin Yarn to Match a Commercial Pattern
Make Socks from Handspun
Make a Scarf from Handspun
Make a Felted Project from Handspun
Make a Large Project from Handspun (Shawl, Adult Sweater, etc. >1000 yds)
Keep a Spinning Journal
Use A Reference Card to Aid Consistency
Spin Yarn for Pay
Dye Fiber for Pay
Write a Book on Spinning
Write an Article on Spinning
Make DIY Spinning Tools (PVC Niddy Noddy, Lazy Kate, CD Spindle, Hackle, Wrist Distaff, etc.)

Again, not shabby since I’m just shy of owning my wheel for two years. I think the biggest area of exploration open to me is exploring other fiber types. Because I did take a class I was exposed to a fair number of wools and natural plant fibers as well as equipment that I don’t own myself. I could really use exploring the more exotic fibers though, though cost has been part of the reason I haven’t explored them. I do have a few blends in the stash that contain some of them though. I’m also really anxious to do some blending - fiber types as well as colors.

How about you? What have you done? What are you anxious to try?

Weekly Randomness…

Filed under: Moi, Knitting, Spinning, Dyeing, Books, Television, Sewing, Miscellaneous — Kristi at 9:29 am on Thursday, March 8, 2007

- I’m in a lull. I think the curtain may be lifting. I feel sparks of project ideas, but it will take a while to nail down details and such. I have sewing and knitting ideas swirling around in my head. Though I have aches and pains kind of holding me back in productivity. I should get the ideas down on paper so they are there for a lull when I feel better!

Reading Fool- I’ve been doing a *ton* of reading. Well, not like some people. But I’ve been reading a book roughly every 2.5 days. I just finished yesterday another book not in that stack because I was given it by a woman in my water aerobics class. It was Sisterhood of the Dropped Stitches. It was a pretty nice heartwarming romantic read about four girls who met to learn to knit while battling cancer as teens. They are all given the official stamp of remission when in their early to mid twenties and celebrate by setting goals they want to each reach by the next year. One wants to dance in a ballet, another wants to get a cat, the third wants to get an internship and the fourth wants to go on three dates. They all find out that goals are great, but they can’t always be met on a deadline. The book is written as a journal of the group. Most of it is written by one of the members, but each of the other members takes a time or two to write in the journal as well. It was decidedly Christian though. It wasn’t as preachy as some I’ve read, but Christianity was certainly a large part of the punch line so if that is not your thing you may give it a pass. If it is something you think you’d like to read, leave me a comment. I’ll send it on to someone if you promise to pass it along to someone else when you are done.

- I sprinkle in a bit of Northern Exposure Season 3 or House Season 2 (mom lent me her House DVDs since I had things to ship to her at a later date anyway). Is it just me or are our television series wrapping up much earlier than normal? The O.C. had the series finale a week or so ago. Psych is wrapped until summer. I’m pretty sure a few others are wrapped - Grey’s Anatomy, yes? That may also include it’s night companions Ugly Betty and Men in Trees…. I know there is often a lull in March while they take a break from February sweeps. But dang, I hope I don’t have to wait until September for most of these to have new episodes!

- I had my second voice lesson with SIL3 last night. It went *much* better than the first one. I wasn’t nearly so nervous. I still was somewhat and that cramps my range and she doesn’t push it much. But it’ll only continue to improve. I’m working on Dido’s Lament by Purcell as my classical piece, Come Rain, Or Come Shine for my jazz piece (which ended up being a good piece to reinforce some of the stuff I need to work on with Dido’s Lament eerily enough), and Defying Gravity from Wicked for my musical theater piece. Yesterday I was playing around on iTunes and discovered that they had an album of Wicked for Karoke! It isn’t the best one out there from the reading I’ve done, but it is much cheaper that what I’ve seen and I could have it immediately for practicing with. SIL3 or I playing the piano accompaniment for it is next to nil. Defying Gravity starts out with 5 flats and switches to 4 sharps and then back to 5 flats. Because I didn’t start learning piano until I was 13, I’m not real good. I can play the easy piano version of most anything and the regular of some things, but once you get into that many flats and sharps it would probably take me an entire year to work out playing it well and I probably still wouldn’t be able to sing with it. Anyway, Defying Gravity on that album is done quite well. Once I burned it to CD I can change the balance and turn down the demo vocals and wean myself onto the instrumental version.

- We may do another spring break road trip to the same location sometime next week! Yeah! I’m looking forward to it. I hope to get lots of fiber to dye. I’m also hoping to score some summer yarns that will coordinate with some skirts that I should be making soon so I can make some tees and tanks to go with them. Oh, speaking of making skirts, SIL3 asked me to help her make a skirt for auditions! I feel honored!

That’s probably enough randomness for now…

- Oh wait! I *hate* Bloglines! They weren’t even letting me manually ping them. It took something like 5-6 hours to pick up my blog yesterday. Grrrrrrrr!

How to Use a Nostepinne

Filed under: Knitting, Spinning, Dyeing, Tutorials — Kristi at 4:56 pm on Wednesday, January 10, 2007

It seemed there were a number of people who commented, e-mailed, or left Flickr comments yesterday that they thought my nostepinnes were beautiful but had no idea how to use one. So, today I took step-by-step photos (and a quick video) so I can show you how to use them.

If you don’t have one there are many substitute options. The cheapest and easiest option is to use an empty tube. This could be from paper towels, toilet paper, a cut down wrapping paper tube etc. I preferred the paper towel tubes because it gave me plenty of room to grip. Your mileage may vary. Others have just used good sized doweling from the local hardware store. If you have a DIY PVC pipe niddy noddy you could use one of the pieces from that as a nostepinne as well. Get creative!

For larger views of the following step-by-step photos please click on the image and you will be taken to Flickr. Some images have notes associated with them as well.

Step 1:

Step 1: If you are using a true nostepinne, make a slip knot in one end of your yarn. Keep the loop large enough that you can slip it over the nostepinne. If you are using a paper tube you can skip this step. Instead, make a small cut in the end of the tube and anchor the yarn in that cut. Put the end of the yarn to the inside of the tube in that case.

Step 2, Option 1: Step 2, Option 2:

Step 2: You have two options if you are using a true nostepinne. You can tighten the slip knot in the groove nearest the handle, or the one at the narrow tip. Some experienced nostepinne users skip the slip knot altogether and instead just keep it anchored in their hand holding the handle of the nostepinne. I prefer anchoring in the wider groove because then you are removing the yarn through the wider opening in the center pull ball. Also, right now I’m getting a much flatter face of the ball towards the narrow top of the nostepinne than I am getting at the wider end. That flat end helps the ball sit still and not roll away from you so it is good to pull the yarn from the end opposite of your flatest edge of your ball.

Step 3:

Step 3: Begin wrapping the yarn around the shaft of the nostepinne a bit closer to the handle than the tip. Wrap slightly loose so the yarn isn’t under too much tension and wrap perpendicular to the nostepinne. You can use your fingers to align the wraps neatly.

Step 4:

Step 4: Continue wrapping perpendicularly around the nostepinne shaft until you have 1-1.5 inches of wraps.

Optional Step 5:

Step 5 (Optional): If you are using particularly thin or slippery yarn (here I’m using fingering weight with a good silk content) you may wish to make a second layer of perpendicular wraps working your way back towards the handle end. It give you a bit more base for the yarn “hook” on when you wrap it.

Step 6:

Step 6: Now begin wrapping the yarn at a 45 degree angle to the nostepinne shaft.

Step 7:

Step 7: With each wrap turn the nostepinne slightly towards you so the next wrap is ~1/4 inch over. Continue until you are back near your very first 45 degree wrap.

Step 8:

Step 8: For the next pass of wraps, lay them right up against the previous round. They shouldn’t be right on top, but they should be quite close. This helps make the yarn ball more uniform. It takes practice so don’t get discouraged. Even ugly balls wrapped this way are easy to work from.

Step 9:

Step 9: Continue as in step 8. However, as the ball grows start catching the yarn on the edge of the forming ball rather than wrapping it up against the nostepinne shaft. This is what will help form the flat bottoms so the ball doesn’t roll. You want to catch it similarly on the bottom of the wrap as well.

To see the wrapping and turning in motion click below. Please excuse the lack of fluidity, but I had my arms wrapped around the tripod to make this video. A bit of a tricky maneuver to say the least.

Step 10a: Step 10b: Step 10c:

Step 10: Loosen the slip knot and gently slide the yarn ball off of the nostepinne.

Step 11:

Step 11: Here is the finished ball. Note how the yarn ball doesn’t automatically collapse into the center. If you are winding the ball and immediately working with it stop here.

Optional Step 12:

Step 12: If you are going to store the yarn balls for a while I recommend giving it a gentle squeeze in a few different places to encourage it to collapse slightly. This eases the tension on the yarn and is better for the yarn if it will be in storage. When stored under too much tension yarn looses its elasticity.

That’s it! It is that easy! I’m certainly not faster winding the yarn this way than the crank ball winder (yet), but the yarn is put under less tension and I don’t have to clamp a swift and a ball winder somewhere. Also, a nostepinne slips right into my luggage which means I can enjoy new yarn immediately while I’m traveling or at wool festivals!

Next Page »