Fiber Fool

Follow the feats and foibles of a fiber fanatic.

Chai Concentrate

Filed under: In the Kitchen — Kristi at 11:09 am on Wednesday, March 24, 2010

Chai Fixings

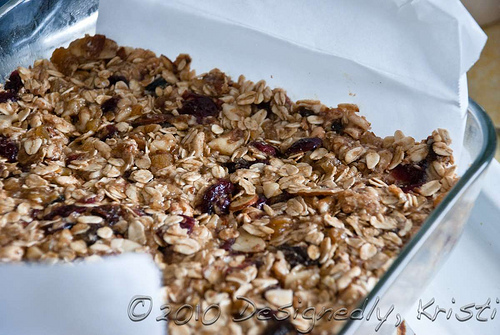
Last week I decided it was time to get back to my curry making that did so much of last winter. While the calendar says spring and 3 out of 4 days concur, the 4th day likes to remind us that snow is still a real possibility around here for a good many weeks yet. Curry just sounded really good. I love my curry with chai though. The milky base allows me to enjoy more flavorful heat in my curry than I could otherwise.

Brewing Chain

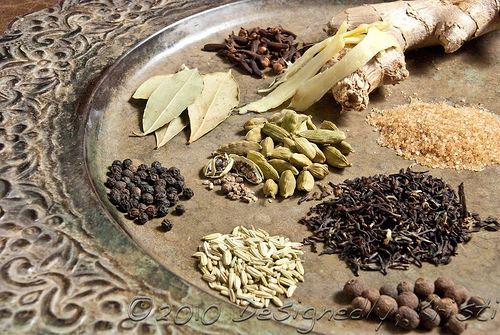
I do find many of the readily available chai concentrates on the market to be a bit too sweet for my tastes and the balance of spices not how I would do it. It is also quite expensive. The bagged chai tea, while with a more favorable price tag, I always find much too weak. So I decided a while back it was time to look into making my own chai concentrate. If you buy your spices in bulk from a local food co-op it is much less expensive than the boxed concentrates and just requires time, much of which is not hands-on.

Straining Chai

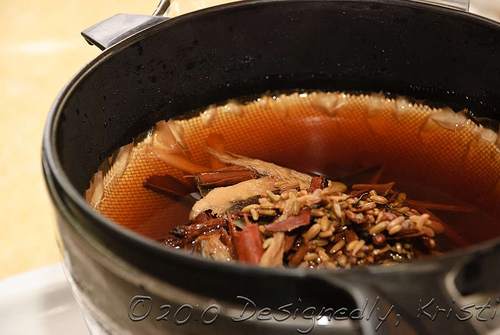
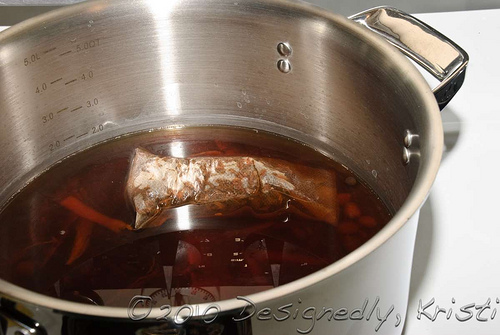
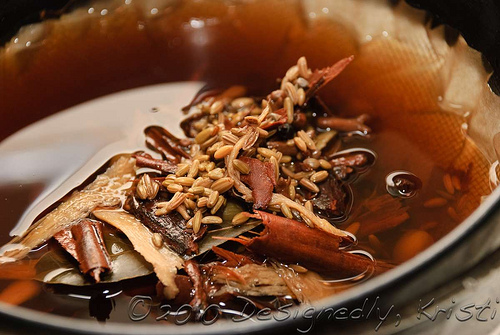
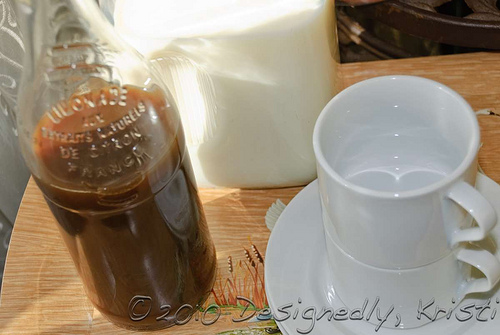
Basically I pour boiling water over the spices and let them sit for 12-24 hours. Then I bring the mix to a boil on the stove for 15 minutes, add the black loose leaf tea (in a T-sac so I can remove the tea without removing the spices) and let simmer for 10 minutes. Next, I remove the tea and shut off the burner and let it cool for 20-30 minutes. I strain out the spices in a coffee filter lined strainer. I put the tea back into the pot, add sweetener of choice (I’ve used honey, agave nectar and raw sugar and all have worked fine, though the honey does add a bit of its own flavor). Then I let simmer until it has concentrated down to half of the original starting volume and bottle it. I use a bail top bottle from French Lemonade that we buy at Sunflower Market it holds just under a liter. Enough for me to fill the bottle and have one cup of sample chai :-)

Straining Chai - Up Close

To drink, I mix it half and half with milk and heat slowly in a small sauce pan on the stove. In the summer I also have drank it over ice, but mix it more like 2/3 chai concentrate and 1/3 milk because of the dilution from the melting ice. I’ve found the concentrate to keep in the fridge for 10-14 days.

Chai Concentrate on Tray

I still haven’t mastered the taste I think of as great chai (that of our local Indian restaurant in Old Town). This most current batch was a tad light on the spicier spices (ginger, clove and cinnamon and perhaps even the cardamom) and a tad sweet. The sweetness might have been right if the other spices had been a bit more forward. I think everyone has their own thoughts on the spice profile of chai. But a great source of recipes to start working from can be found at http://www.chai-tea.org. This one combined with a recipe the fabulous Rahchayl from Monday afternoon knitting shared with me are my starting point and I just take notes on each batch I make. This is my fourth batch I’ve brewed and I’m getting closer. I think another batch or two and I might be there.

Roasted Red Pepper Hummus in Pictures

Filed under: In the Kitchen — Kristi at 10:44 am on Thursday, March 18, 2010

Hummus Ingredients

I’ve been going to a gym lately. My mom (who has lost over 100 pounds and is now in a size 12) inspired me while I was home in December and January. I keep telling myself I’m going so that I can continue to be on the computer and knit as many hours per day as I would like and that is true. But it would also be really nice if I could also loose some weight. I’ve been going pretty religiously for 6 weeks now and the only difference I can see is that my shoes are all too loose :-/

Roasted Red Pepper Hummus In Process

I finally decided some more adjustment in diet was necessary. I almost always feel that I’m low on protein and fiber. Several years ago I used to weekly prep a big container of fresh veggies and then would have some variety of store bought dip that I’d take to SnB. It was handy as we rarely went through the whole container so I had easy access, already prepared healthy snacking options right at hand. So last week I decided to prep some veggies for myself and I decided to dust off the food processor and make my own hummus. To keep the fat down a bit I like to use a roasted red pepper in my hummus. It adds some additional moisture and allows me to cut back on the amount of olive oil. Sometimes I’ll add lemon or lime juice as well. We were out when I made this batch.

Roasted Red Pepper Hummus on Celery

My fresh veggie consumption is up and I get some protein with all that good for me fiber thanks to both the chickpeas and the tahini. There was something a little off with this batch, though still definitely edible and tasty in its own way. I didn’t consult any recipes despite it having been a year or more since I last made it and I think I put too much tahini in. So I have no recipe to share with you right now. Maybe in the future.

Do you have other favorite dips for veggies that can be made at home? I suspect if I only make hummus this experiment will have a limited period of success. Low-ish fat and some protein would be a plus!

New Equipment, New Photos and New Sur la Tête

Filed under: Knitting, Photography, Sewing — Kristi at 4:02 am on Monday, March 15, 2010

Spring Sur la Tête Hats

After discovering how cute Sur la Tête was when knit with positive ease rather than the standard 10-20% of negative ease usually used for hats, both Amanda and I wanted hats one size larger. Since our originals were in relatively “winter” colors we opted for spring colors for the second round. I used lunch at a local brew pub as a bribe for Jess, my sister-in-law, to come up with her boyfriend and model my hat while Amanda modeled her own.

Spring Sur la Tête Hat

When we were first scheduling the shoot the weather looked like it was going to be bright and sunny and timing was looking to be at nearly midday. I took that as the excuse I needed to finally invest in a proper 5-in-1 Diffuser/Reflector. I had been using my windshield visor from my car as a reflector, but I did not have a way to diffuse sunlight if any of our locations were to be in direct light. When I took the lighting class from Joe Coca he had made some fantastic diffusers with canvas stretching frames and mylar but I didn’t think a parent sized sheet of mylar would be large enough to cast shade for both Jess and Amanda in one shot so I decided it was time to retire my hacks and get a proper 5-in-1 Reflector in a largish size - 43″.

Spring Sur la Tête Hat

As it ended up, it was very overcast and rather chilly (had to tone down a red nose more than once in post-processing since we were out and about for nearly 2 hours). I was sort of disappointed since the original hats were also shot on a gray day (with snow). But, since I had my new reflector I was able to simulate sunlight a tad by using the gold surface to bounce my flash off of (the two pictures above). In that respect the weather was great and I never had to worry about the mile-high sun and the harsh and unflattering shadows it can cast around here. I did miss my usual assistant (DH had deadlines for work and mid-terms for grad school approaching fast) though so I did not put it to use as much as I would have liked. There are stands you can use for them, but with the 43″ size the slightest breeze will catch it so that was not an option last weekend. Though I think a stand is the next thing on my affordable wishlist as it would come in handy when I’m shooting in the house, that and a stand for my flash unit too, and… and… LOL!

Spring Sur la Tête Hat Spring Sur la Tête Hat

You may note that I opted to add a touch of embellishment to my hat. I put a satin and velvet ribbon that I got at The Berry Patch in Niwot around the brim of my hat over the garter stitch section. Doing so added an almost slouch-like effect to the fit creating a third look! It took a bit off pondering and asking for input from many friends to decide how to attach the ribbon. I ultimately went with Deb’s suggestion to zig zag across the width of the ribbon and tack not too frequently. If you look at the image below you can see the inside of the hat where I’ve enhanced the thread to make it show up a bit more. I ended up tacking at the top transition between the satin and velvet at the middle of a leaf at the bottom transition at the end of the leaf all the way around. I still wonder if I was infrequent enough. I did leave a tad of slack in the thread so there is a bit of play in the ribbon as the knit fabric stretches.

Inside of Sur la Tete

And from the front both off and on…

Spring Sur la Tête Hat - Detail

Spring Sur la Tête Hat

Amanda’s is currently unadorned, but she has some big plans involving both ribbon and beads. I’m very intrigued to see the final result. She did opt for crystals for her buttons instead of pearls and it creates a fun and light look great for a spring or Easter hat…

Spring Sur la Tête Hat

Spring Sur la Tête - Detail

Despite the clouds and cool weather I think we had a good time wandering around Old Town.

Spring Sur la Tête Hats

Granola Bars

Filed under: In the Kitchen — Kristi at 10:02 am on Thursday, March 11, 2010

Homemade Granola Bars

A couple weeks ago, just after DH and I had a conversation about how in general the bulk of our groceries are unprocessed or unprepared foods with the exception of the quantities of granola bars we are going through with his being in grad school I stumbled upon a link to Smitten Kitchen’s granola bar recipe. The recipe haunted me for several days. I had been under the weather when I first saw it, but it spurred just enough energy in me to pick up a few groceries and put it together.

Homemade Granola Bars

I had a few goals in mind when choosing my 2-3 cups of extras (above and beyond the oats) - fiber and healthy fats. So while creating my oat flour in the food processor I added some flax seed in towards the end. I also choose to use mostly walnuts for the nut portion, but I did add a bit of almonds as well. For fruit I kind of went over board and it made them a bit too sweet for my tastes (my biggest complain of commercial granola bars as well) - craisins, raisins and dried apricots. For a bit more bulk I also add a bit of Kashi Honey Puffs, a lightly sweetened cereal made from puffed grains of several varieties.

Homemade Granola Bars

I also switched things up a tad and used agave nectar in place of the corn syrup and omitted the water since it is more viscous than the corn syrup. I used raw sugar for the sugar. I also added a touch of nutmeg with the cinnamon. I did still use the butter, but I’m anxious to try a healthier oil option. I stuck with natural peanut butter as I prefer the least processed food as possible and the nutrition numbers are usually better as well.

Homemade Granola Bars

I did put numbers into a spreadsheet to guide whether I cut the pan into 9 or 16 pieces. The numbers were crazy and definitely required cutting the pan into 16 pieces. So I started playing around with other options to try get the numbers close to the healthy snack range of around 100 calories. Well, I couldn’t get it there, but I could get the numbers to under 200 calories per 1/16th of the pan and the huge advantage over commercially made granola bars - I could keep the carb level near the magic 10% mark (ie. 100 calories and 10 g carb) that mom’s nutritionist wants her at.

Homemade Granola Bars

The big trick was to limit the fruit portion of those 2-3 cups of stuff to be only 1/2 c. Both craisins and apricots are good choices for the fruit. If you are wanting to watch your carb ratio, skip the raisins. For a touch more protien sub low fat soy flour in place of the oat flour. For a bit lower fat use almond butter in place of the peanut butter. Now, I haven’t tried any of these options yet, that is just looking at numbers on paper. But, these options bring the calories per 1/16th of the 8×8″ pan down to the 180-195 calories rather than the 235 calories of my first batch - yikes!

Homemade Granola Bars

I’ve been obsessing over flavor combinations I think would be good but are not available in commercial bars. The one I’m really itching to try is a chocolate and ginger one. A few years ago at the then weekly game night someone brought a chocolate and ginger trail mix that had amongst the typical fruit and nuts crystalized ginger and chocolate chips. The flavor combo blew me away! With the sugar of crystalized ginger and chocolate (figuring semi-sweet) the numbers go back up a bit (212 cal, 23 g carbs), but I think it would make a great healthier alternative for dessert some time.

Homemade Granola Bars

What things would you want to add for your 2-3 cups?

Leftover Pearls Make Jewelry

Filed under: Miscellaneous — Kristi at 10:05 am on Tuesday, March 9, 2010

jewelry-2wtmk

Well, the pearls I showed off last week in their purchased state and in the tutorial on making buttons from beads did not get used up. I had to buy a whole string of the cultured pearls when I only needed 12 for my project. It was a good thing as not all cultured pearls are created equal so some were not really button or jewelry worthy. Since I had my wire working mojo back thanks to the buttons (and I fell in love with Amanda’s coiler pliers which I still had on loan), so it seemed only right to put at least some of them to more use.

I’m not one of those people who feel nekkid if I leave the house without jewelry on, but I do enjoy wearing it from time to time. I’m also very much a sucker for vintage-like things (ask my sister) so when I stumbled upon this line of antiqued brass components I had to practice a bit of restraint :-) But I think the bronze really goes well with these pearls! I’m half tempted to go get a few more components. But since I don’t have any solid designs in mind I think I’ll just steer clear of that part of town for a bit…

jewelry-1wtmk

Next Page »