FO Report - February Lady Sweater
 Pattern: February Lady Sweater
Designer: Pamela Wynne w/ Elizabeth Zimmerman
Size: XL
Yarn: 5.2 skeins of Cascade 220 Heathers in Mahogany (2454)
Needles: US 8 and 9 (for lower body)
Buttons: Square Handmade Paduk buttons from Cyndy of Riverrim
Made For: My selfish self :-)
If you’ve been here much you may realize this is my first sweater. Yes. Really. Sort of. I did the Ribs and Lace Tank in the spring of 2007 and immediately started a Sahara which needs lengthening and for me to loose 20 more pounds so it isn’t actually finished. And seeing as how Ribs and Lace is sleeveless it doesn’t *really* count as a sweater in my mind. Around here the emphasis has always been on socks and other smaller, more affordable projects. That said, did you see the skein count required? Just barely over 5 skeins and it looks fabulous in this economical yarn made even more so with my teaching discount. With affordable yarn that is nice to work with I don’t know what took me so long to cross over to the land of sweaters! And now I’m stuck on sweaters :-)
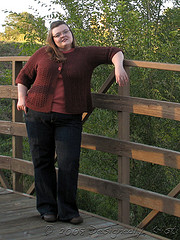
 FLS was a quick and easy knit, requiring only two weeks — and that was with a few days off and in one of the larger sizes! The pattern isn’t overly detailed so looking at people’s modifications and reading the discussions at the KAL on Ravelry may be helpful for someone embarking upon this project. There was a lot of help there for choosing the proper size and such. It is definitely easy enough to be a first sweater even for relatively new knitters. If you are a pretty new knitter it might help to have someone experienced to bounce ideas off of though. The top down construction makes it easier to fit and modify because you can try on as you go. I also love how versatile the sweater it is. It looks great with jeans or cords, but also with skirts or dress pants. Wear it with a tank top, tee shirt, 3/4 length shirt or even a long sleeve tee!
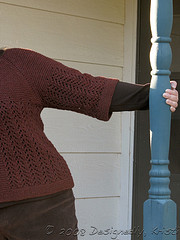 As many have done, I made some modifications. On my last row of raglan increases I did so only in the body sections and omitted them in the sleeves because I was then able to truly space the eyelet increases at every 7 sts starting 7 sts after the band and ending 7 sts before the band on the other side. Then because I’m a bottom-heavy hourglass with a very short waist I did 18 repeats of the gull lace, switching to US 9 needles on repeat 9 to give a bit more fullness through the high hip. I also made my bottom garter band closer to 2 inches long rather than the called for 1.5 inches so that it balanced better with the vertical bands. When it came to the sleeves I followed the lead and decreased away the extra 7 stitches at the underarm on every other rnd so the sleeves had a more fitted silhouette. In my size one really doesn’t need extra bulk in the arms. The bottom of the sleeve still has a nice bell look to them. I didn’t note the number of lace repeats in the sleeve, but I think it was 15 repeats (including the one repeat before splitting the sleeves off from the body). I also stayed on the US 8s. I was a little nervous that the sleeves would be too fitted to go over tees so I didn’t weave in the ends until post blocking. But as I suspected there was just enough growth in the lace while blocking to make them about perfect!

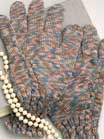
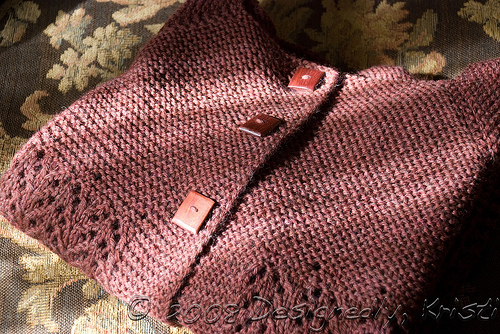
The icing on the cake of this sweater is no doubt the buttons. They are handmade paduk wood buttons from Cyndy of Riverrim. The color is great with the yarn and square buttons are a little funky and *very* me (I have an obsession with squares). The look is wonderfully organic. The only drawback to wood buttons (most of them anyway) is that they are not washable. Now it isn’t like I wash my cardigan sweaters frequently, but I knew if I had to sew buttons back on after each washing it would keep me from both wearing and washing the sweater. My solution for easy washing was to adhere the buttons to button cover hardware. I then sewed flat clear buttons that fit in the button cover hardware onto the sweater. Due to the extra weight of the hardware I sewed two buttons on for each buttonhole - one on the front and one on the back. It gives just a little extra support and keeps the buttons form looking droopy. Now when the sweater needs to be washed I just remove the buttons and replace them when the garment is dry. It takes only seconds and no more needles :-) It did take me a while to gather the courage to attach the buttons to the button cover hardware, but now that is done and everything seems secure I’m very glad I did. If I wanted I could even change up the look of the sweater and have a couple different sets of buttoncovers ready to go on if I wished. Though frankly, I can’t imagine finding buttons that look better than these.
If I were to make another one (which is totally possible believe it or not) I would do yos for the raglan increases to tie in with that eyelet round and the lace. I’d also cast on a few more stitches for the fronts to account for the overlap and my anterior assets. Other than that I think it is a great sweater and I suspect it’ll get quite a lot of wear this season and the seasons to come.
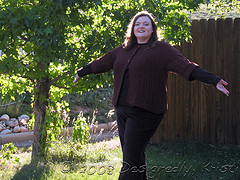
And because I just couldn’t resist making my swing cardigan swing…