Carving 101
This class was taught Tuesday, November 13th, 2001 at 10pm Eastern Standard time on crafts.dm.net IRC channel, room #craftclass. At the end of this class there will be a link where you can download the log from the class.
Choosing and Prepping Your Design
There are many places where one can obtain ideas for carving. My experience is that once you begin carving you will find inspiration EVERYWHERE! LOL! I've even taken home a wrapper from chopsticks to scan :-) Even if you do not think yourself artistic, or able to draw, you can still carve. Clip-art is a great place to start and there are many sources where you can get them in any variety of styles and subjects. The widest variety is available in the form of Dover Clip-Art or Pictorial Archive books. But, there are online subscriptions services where you can download unlimited images for a flat fee for a given period of time. The most notable of these subscription services is ClipArt.com (formerly known as ArtToday). They have many of the Dover images available as well as clip art from many other companies.
Once you have found your design, you may need to size it to fit your carving material. This is especially true if you are working on an eraser. I like to scan the image and use Photoshop or any graphics editing package to size it to what I want. You can also size it using a photocopy machine. If you are going to use a copy machine, you may wish to invest in a proportion scale. It's a round wheel (like a color wheel) that will tell you the percentage that you need to enlarge or reduce the image to the size you wish.
Once you have it the size you wish, you can trace it onto tissue paper if you did not use the copy machine or do not have access to laser printer. If you used a laser printer or photocopy machine, you are ready to perform the transfer! If using the tissue paper method, I suggest using a soft lead pencil to trace and color in the solid pieces. I find the soft lead transfers to the carving material a little easier. I do like using the tissue paper method as I find it lends a bit more of my own style to something I did not originally design.
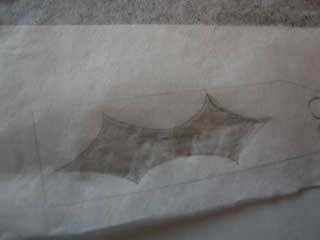
In the above photo I was using a scrap of PZ Kut, so I traced it onto the tissue paper and then freehanded my holly leaf design to fit the size of my carving material.
< Go Back to Materials List :: Continue on to Transferring your Design >