Prepping Photos for Carving Using Adobe Photoshop 6.0
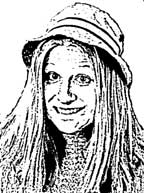
Here is one that is basically ready for detailed carving. There are extraneous little dots and such and you can go back and use the wand tool to remove some of those. Since I am now mostly doing tissue paper transfer with a pencil, I just won't trace those areas. I like doing the tissue paper transfer because it adds more of "me" into the work with the extra tracing step and such.
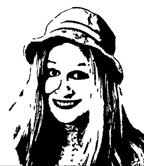
Here is one that is quite suitable for acetone transfer. This one was done by adjusting levels, then removing extraneous stuff with the lasso tool, then I switched it to grayscale right away. Next, I used a different filter - the cut-out filter (Filters > Artistic > Cutout) and adjusted the parameters until it looked as I wished. I lost a lot of detail so I used undo. Then, I went in and used the dodge and burn tools to darken and lighten the areas needed. I also added some curves to delineate the edges of the hat by using the pen tool. I kept doing the cutout filter and undoing until I had brought out the appropriate features and removed the unnecessary features that were an artifact of the photo and the digital format of the picture.
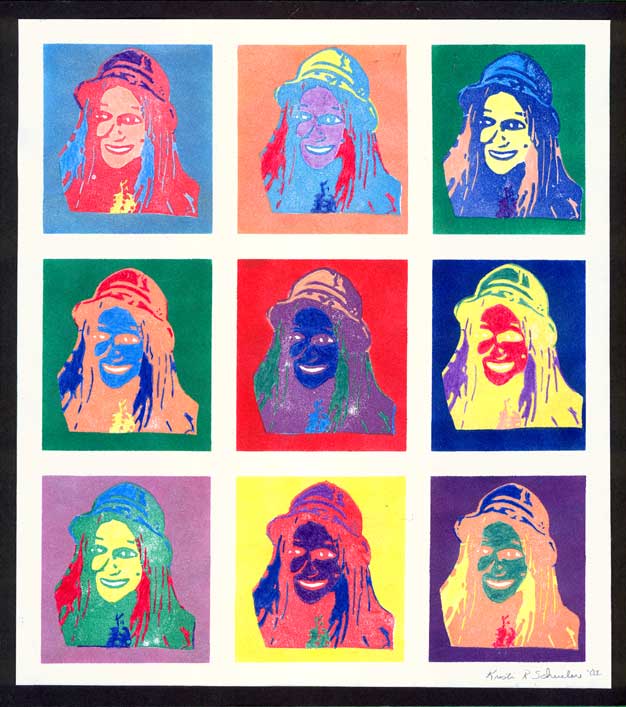
The above is a print I made from the stamp carved from using the second of the prepped images. All the images were printed on matte white cardstock using Brilliance inks. Masks were used and brilliance inks were sponged on to make the color blocks. The details were colored in with Caran D'Ache colored pencils. This print was given as a gift to the person in the photo. You can see a near-scale version by clicking on the image above.