Carving 101
Making your First Cut
Take the scrap paper and place it beneath your carving material on your work surface. Now, I have found that even for the primitive looking carvings there are at least places in the design where you want a nice, clean line. To do this, take a very shallow cut with the gouge around the perimeter of the design (or where ever you wish to have a clean line) and carve a line all the way around without picking up the tool. Use the paper beneath your material to turn the design.
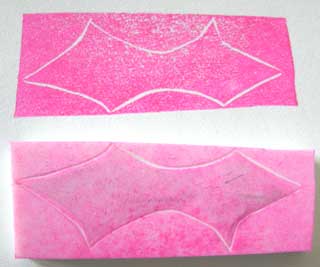
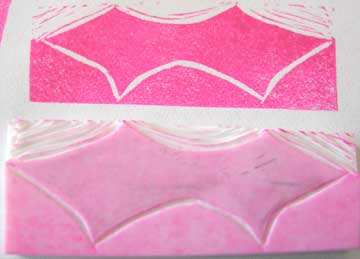
For the holly leaf shown below, I did pick up my gouge at each point. That is because I wanted points and not roundness, which is what would have resulted if I had not picked up the tool. So, use your judgment on when to pick up the gouge from the carving material. Now, use your red or pink dye-based ink pad and make a test print. You may wish to number the prints so you can see the progression of your design when you are done.
Examine your first test print. If there are areas that are jagged that you wish to be smoothing, go back in and touch them up now. You can smooth them out by recutting that section just slightly towards the inside of the design.
Next, take your gouge towards the outside of the outline and add a little additional pressure. This will widen your outline. For the first carving I suggest taking another test print for becoming familiar with the process and taking note of the changes you are causing. My second test print is shown below.
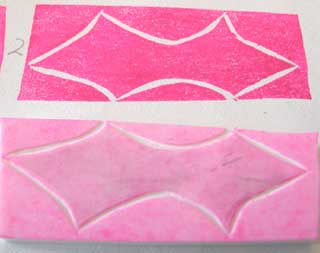
If you would choose to stop here, you would have a negative block print, where the imagery is created by the light line that results from the removal of material. Continue on if you wish to create a positive print.
Carving Away the Excess Material
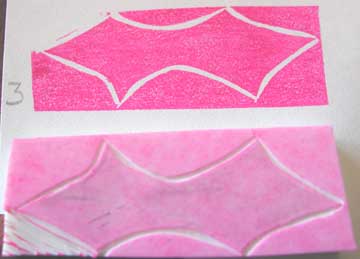
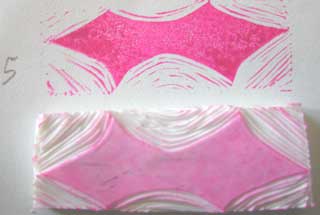
Now, you can start to remove the excess material on the outside of the design. Follow the contours of your design. This will lead to a more natural look if you are aiming for the primitive carving look. The stray marks will follow your design and can appear like shadows. Below are a succession of prints from removing the excess material. Normally, one would not need to make so many test prints. I just did so as a means of illustrating the process.
< Go Back to Transferring your Design :: Continue on to Cleaning up your Carving >