4/6/2006
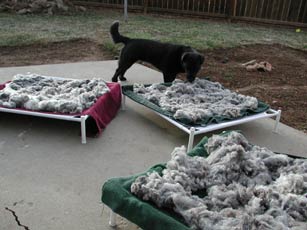
As you all so wisely knew long before I did, when Liz and I went out to Black Pines Sheep I of course came home with some fleece. I was reserved though since I do not have a drum carder or combs or even so much as a proper flicker. I bought a 1/2 CVM/Romeldale fleece of about 3 pounds. So, on our way home from lunch and the IWP tour we stopped off at Bed, Bath and Beyond to purchase a salad spinner and some mesh laundry bags. Then Liz gave me a lesson in washing fleeces. Since Myrtle was very generous I got instructed on the differences in washing between Wensleydale and Teeswater versus the CVM/Romeldale. Below are some photos and instructions on how Liz taught me to wash fleece.
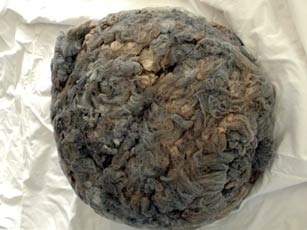
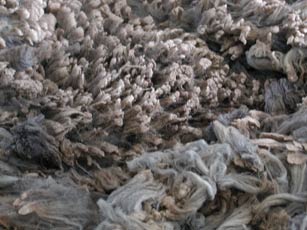
First, take the fleece out of the packaging and roll it out flat to double check the skirting and seperate the fleece into batches of similar characteristics if it isn’t uniform. Similar staple lengths and crimp should be together of if you want to sepeate colors. We did this on the kitchen floor on an old bed sheet. It worked quite well.
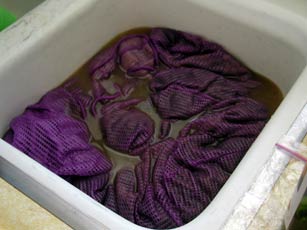
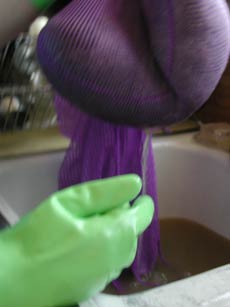
Take roughly 1-lb of fleece (or 1/3 the size of your mesh laundry bag) put it into your mesh laundry bag and close. Then run one side of your sink full of the hottest water you can get. Place the bag into hot water while filling the other side of the sink with equally hot water. Gently press down until the wool all sinks to the bottom and is all wet. There is no need for soap here yet you are just removing the dust and dirt. Don’t leave it to soak too long or all the dirt will resettle onto the fleece, so pull out by the top of the bag not really getting in contact with the wool and drain the sink. Remove fairly quickly after about 1-2 minutes. Let gravity drain most of the water off and then gently use the pressure of the bag to push a bit more of the dirty water out. Because I have some after effects of a car accident and am a bit weak I’ll often use the side of the sink to help me remove so the water. Place the bag agains the edge and with one hand gently apply pressure straight to the wool. You don’t want to agitate as the hot water has opened the scales on the wool and could cause it to felt. But, don’t be scared of the wool either.
Repeat in the other side of the sink and continue until the water is mostly clear. You may wish to change the orientation of the bag in the water to expose other parts of the fleece to the water.
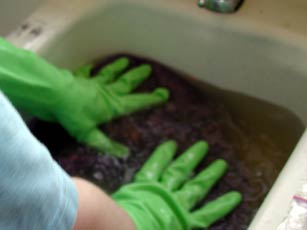
Once the rinse water is semi-clean and definitely no longer opaque add some mild detergent to the next sink of water. Liz recommends Era Plus. We used Palmolive dish soap because it doesn’t have drying agents like many other dish soaps and we could not readily find Era Plus without a chase around town. If using laundry detergent, choose one without extra brightners or chlorine etc. Continue in the same manner, letting it soak in the soapy water for a few minutes, but don’t let the water cool down too much or the grease and the soap will redeposit on it. I’d say we left it soak in the soapy water for about 4-6 minutes. For cleaner fleeces like these usually 2-3 sinks of soapy water will remove the lanolin and any remaining dirt.
Repeat again with clean water to rinse out the soap. Again this will likely take 2-3 sinks.
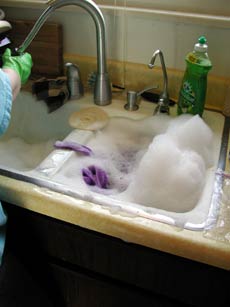
When the sink water is free of soap put the wet fleece in your salad spinner and keep running it until you have no water to tip out of the spinner’s bowl. You would flip the fleece over and reposition it for each round in the salad spinner. This fleece took about 3-4 runs through the salad spinner per bag of fleece washed. Then spread the fleece out on drying racks or a bed sheet. I only lined the sweater racks with towels because DH is a little finicky and I was concerned of his being convinced that the racks forever smelled like sheep.
Repeat all these steps until your fleece is all cleaned.
There are many different ways in which to clean a fleece. I prefer doing small batches in the kitchen sink because it is easier on my back. Also, I can be filling the other half of the sink for the next step while I’m completing each step. But if this doesn’t sound like the method for you, one of these might work better…
* ICanSpin.com
* Fuzzy Galore - has really good scientific reasoning for some of the steps
* The Joy of Handspinning
* Divergent Threads
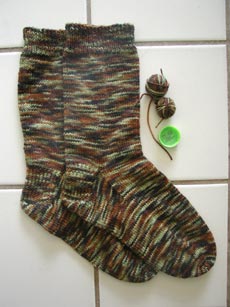
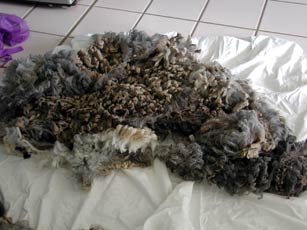
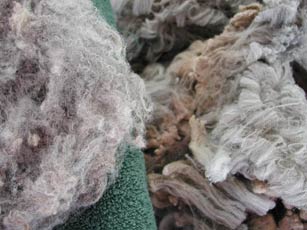
Oh, and one last photo… Check out the difference between the washed (left) and the unwashed fleece…
Happy Washing!
12/14/2005
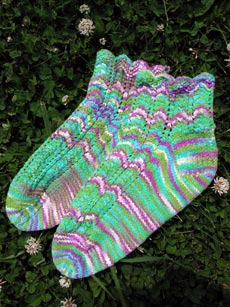
*Finally* I can share this dyeing experiment that took place during dyeing week in late November…
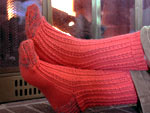
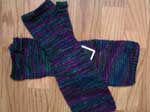
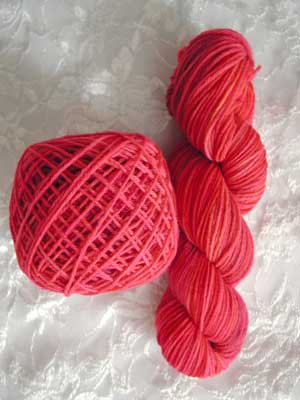
This yarn was dyed for fellow SnB gal, Amanda. Her birthday is on Friday, so I brought this yarn to her on Monday night at SnB. It is also dyed with Wilton food coloring like the other yarns I dyed that week, but this one got a special treatment as well that will result in 8 or 9 *matching* stripes per sock, so kind of thick stripes.
How did I do this you ask? Well, let me tell you…
I used one skein of KnitPicks Color Your Own Sock Yarn and the 4 main red/pink colors of Wilton’s food coloring. You can use any colors you want, though I suggest when you start to use analogous colors (colors that appear next to each other on the color wheel) or different shades of the same color family because it isn’t an exact science and some bleeding of colors can occur, especially the first time you try it.
1. Take the hank of yarn and wind it into a center pull ball.
2. Take the center pull ball and with both ends together, wind it into a doubled center pull ball. Clip the loop so you now have the skein split in half.
3. With your swift at it’s widest (~2 yd circumference), wind the double yarn onto the swift between 10 and 15 rotations. I tie a little bit of scrap to one support of the swift so I can more easily count the rotations. Then, tie this round of yarn in 4-5 spots. It may seem excessive, but it is *very* helpful to the process. Just be sure the ties are loose enough that the dye will still penetrate the yarn.
4. Repeat step 3 until all the yarn is used, tying the most recent group of rotations together and making sure not to get any other rotations tied in with it by accident. This will result in roughly 20-30 yd lengths of yarn for each skein of sock yarn in each section.
5. When all the yarn is hanked and tied into these mini 20-30 yd hanks, figure eight tie very loosely all the groups together with one large tie.
6. Soak yarn for a couple of hours in a strong vinegar/water solution.
7. Prepare your dyes to the strength you desire and put in large squirt bottles (I used ketchup bottles from the dollar store). Since I was using food coloring I mixed it with a strong vinegar/water solution.
8. Prep your dying space with protective newspapers and such, then lay down a run of plastic wrap long enough to easily incase the length of your hank.
9. Lay down the first mini-hanked section, apply the desired dye, wrap in saran wrap and move slightly to the side.
10. Lay down another sheet of plastic wrap and repeat step 9. Repeat this until the entire hank of yarn has been dyed.
11. I had a few sections that weren’t as well contained in their plastic wrap so I then wrapped the whole darn thing in plastic wrap again.
12. Place in a wire mesh strainer (dedicated to dyeing) over boiling water and steam for at least 45 minutes. If you are using a hard to set color like red, you might consider steaming for up to 2 hours. Be sure to flip your wrapped up yarn over a couple of times during the steaming process to ensure that all areas get plenty of direct steam heat.
13. Let cool before rinsing. This can aid in exhausting the dye in some cases.
14. Rinse.
15. Let dry.
16. Now, you need to reskein it into two separate skeins. It’s a piddly process because in winding the doubled center pull ball and putting it on the swift, the two strand of yarn have twisted around each other. So, I recommend making two center pull balls by hand as you pull the yarn off the swift. This way you can easily untwist the two strand of yarn as needed easily. I used two poor man’s nostepinnes (empty toilet paper tube and an empty paper towel tube) in this case. You can hook one strand up to a ball winder, but I personally found it easier to just have the two handmade balls in my lap.
17. You may keep them in these center pull balls. If you used a ball winder or nostepinne there shouldn’t be any problem with storing them long term in the ball form. If you did not have the open space for the ball to expand into you may loose elasticity in your yarn and you should then use your swift to put it into skeins again for storage. You might want to flag the matching ends of each skein if it isn’t obvious which ends match.
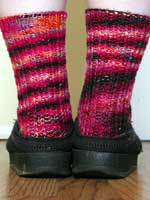
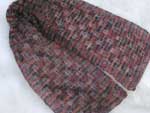
Now, with the red, I of course had trouble with the color setting, but I had steamed for a solid two hours. So, I unwrapped it and put it into the water and set it further in simmering water. This caused some bleeding of the different reds together, so the striping is subtle, but more noticeable than I thought when I first removed it from its bath. Also, because I tried rinsing for a while before putting it in for another bath it made the sock much more pink than I was originally intending, but I actually quite like it.
I decided to name it strawberry trifle because I figure the thicker stripes in the socks will look like the layers of a trifle and I thought the color was quite reminiscent of strawberry flavored things (like DH’s liqueur etc.).
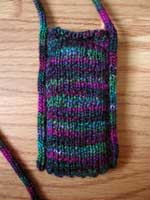
When I was making the center pull balls of this yarn the one on the paper towel tube worked out much better for me (look at it, it’s the one still in a ball up there). I think that was because I have more room to hold onto so the movements could be smoother, which then resulted in a much more uniform ball of yarn. It makes me want a nostepinne or two :-)
I’ll try talk Amanda into letting me blog the completed socks whenever she decides to knit them up so you can see the truly final result of this dyeing experiment.
6/1/2005
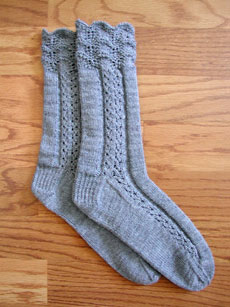
In order to respect Interweave’s copyright, I will not be walking you through the process to covert their Retro Rib sock pattern into clog/sandal socks. But, if you continue reading you will find a nearly four-page tutorial on how to convert pattern stitches from the leg to flat knitting so they can be continued along the heel for wear with clogs or sandals. I will walk through contiuing a K3, P1 rib, as well as Nancy McGlynn’s Seaweed socks as examples.
(more…)